 Walkthrough
Choose Open or press ⌘O and select a folder containing JPG or JPEG files. New imports use photos directly inside that folder. Walkthrough saves the job and its organization in this Mac’s private library. The five-step Getting Started guide uses real app screenshots to cover Open, Group, Order, Name, and Process Photos. Enlarge screenshots or switch between detail and full views. Replay it anytime from Help → Getting Started.
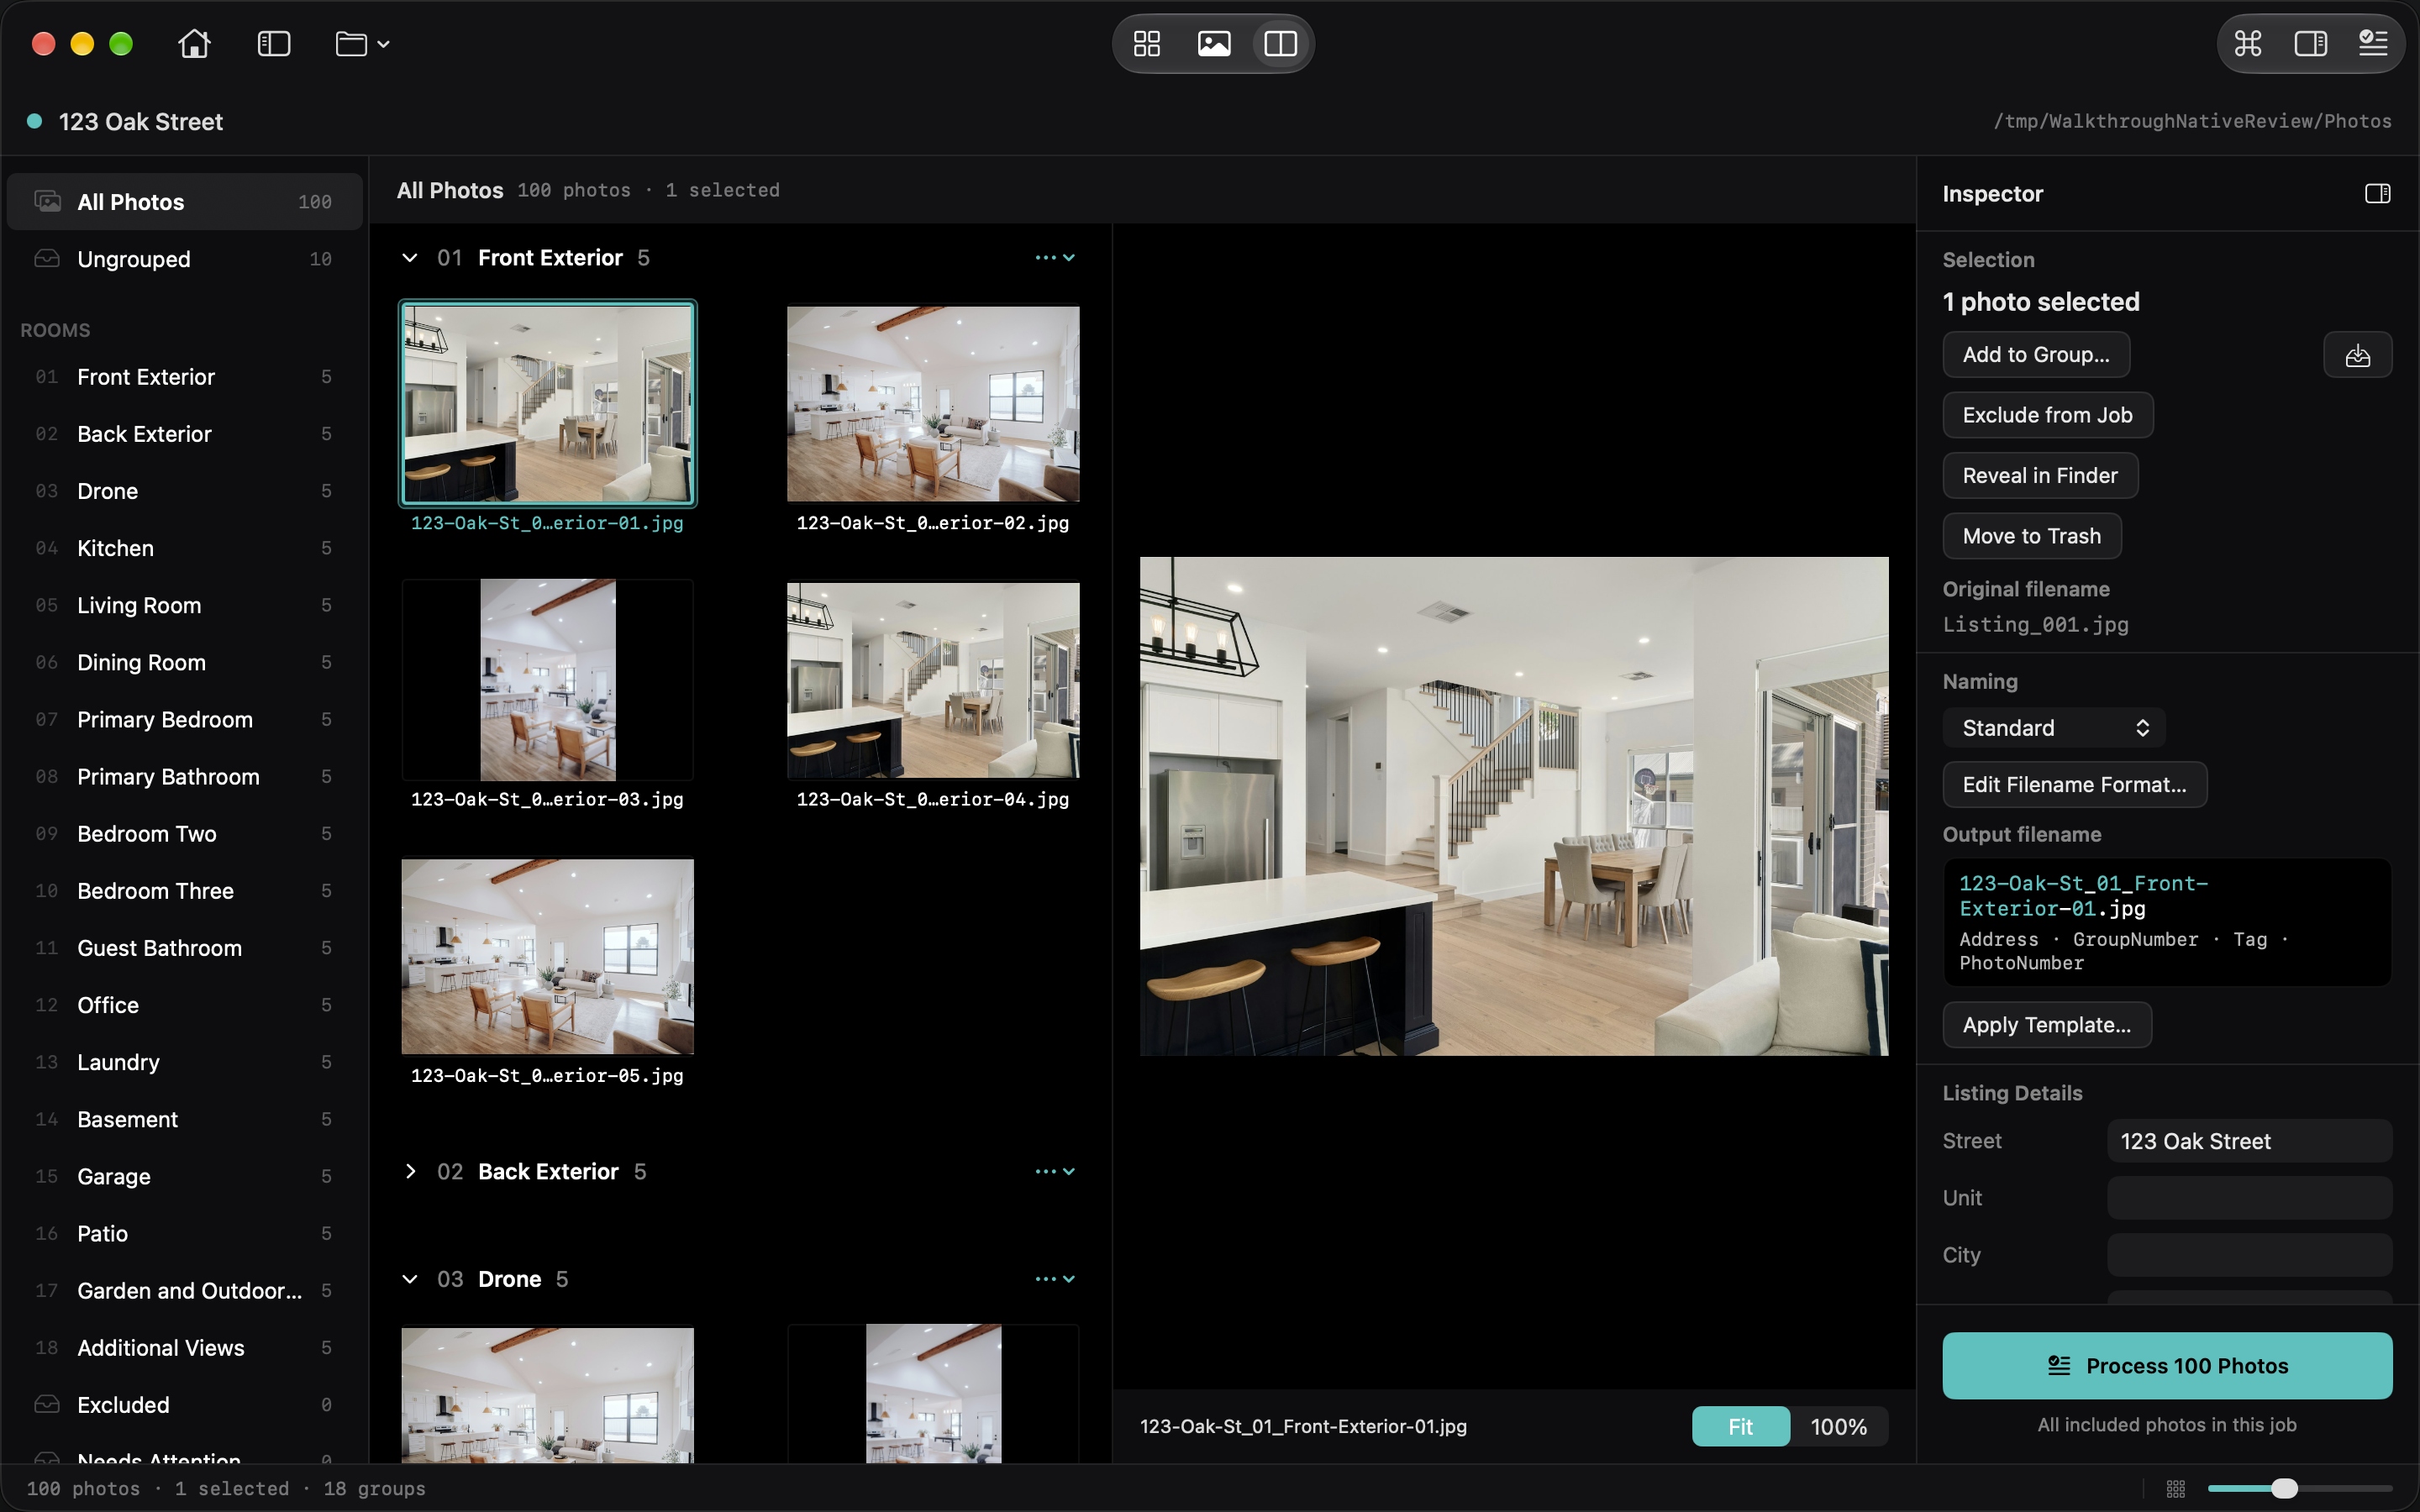
The room sidebar has All Photos, Ungrouped, and your ordered rooms, with a photo count beside each. Select a room to work with just its photos. Arrow keys, range selection, Select All, and the preview filmstrip follow that scope. Switching rooms clears the previous selection. All Photos keeps the complete listing available, including collapsed groups.
Choose Contact Sheet, Preview, or Split in the toolbar. Drag the native dividers to resize panes. Rooms and Inspector buttons show or hide the side panes; a pane may collapse at smaller widths to preserve space for photos. The inspector contains selection actions, original and output filenames, naming presets, templates, and listing details. Its pinned Process X Photos button counts all included photos in the job, independent of room or selection.
Enter the listing address, select photos, and press G to choose a group or create one. Command-click adds or removes individual photos; Shift-click selects a range. Drag photos onto a sidebar room to assign them, or onto Ungrouped to remove their grouping.
Drag rooms in the sidebar, use their context menu, or press ⇧G to arrange the delivery order. In the order editor, Up/Down chooses a room, Option-Up/Down moves it, and P lets you enter a position. Apply Order updates the filename sequence. Grouping, group renaming, ordering, and preset/template application support Command-Z.