 Ingest
Ingest / The guide
From a full card to a finished folder.
Everything the app does, in the order you meet it. If you have five minutes and a card in the reader, start with the quick start instead and come back here for the parts you want to go deeper on.
Cards and folders
Put a card in and it appears in the sources list with its name and free space, and Ingest opens it. Press ⌘O to open an ordinary folder instead. Either way you are looking at photographs within a second, before the app has finished reading everything.
The sources list holds four things: your saved views of the current source, your workspaces, any cards that are mounted, and your favourite folders. ⌘D adds the folder you are in to the favourites, and the number beside each one is the key that opens it.
⌘[ and ⌘] go back and forward through what you have opened, like a browser, so switching to the card and back to yesterday's folder costs one keystroke.
⌘E ejects. Ingest closes every file it has open on the card first, which is why eject does not fail with the usual complaint about a file in use. If you pull a card without ejecting, nothing breaks. Ingest notices and closes the source.
There is also a menu bar item, on by default, showing the progress of a running ingest, the cards that are in, and your recent folders. It is there so a copy can run while you work in another app.
Browsing, and why it is fast
A raw file is large and slow to develop. But every camera also writes a finished JPEG inside that raw file, so it has something to show you on its own screen. Ingest finds that JPEG and reads only those bytes. A Sony ARW is 76 MB; the preview Ingest reads out of it is a few hundred kilobytes, and the full size JPEG inside it is about six.
That is the whole trick, and it is why arrowing through a card feels like arrowing through a folder of thumbnails. Nothing is developed, nothing is rendered ahead of time by a background process, and there is no import step before you can look.
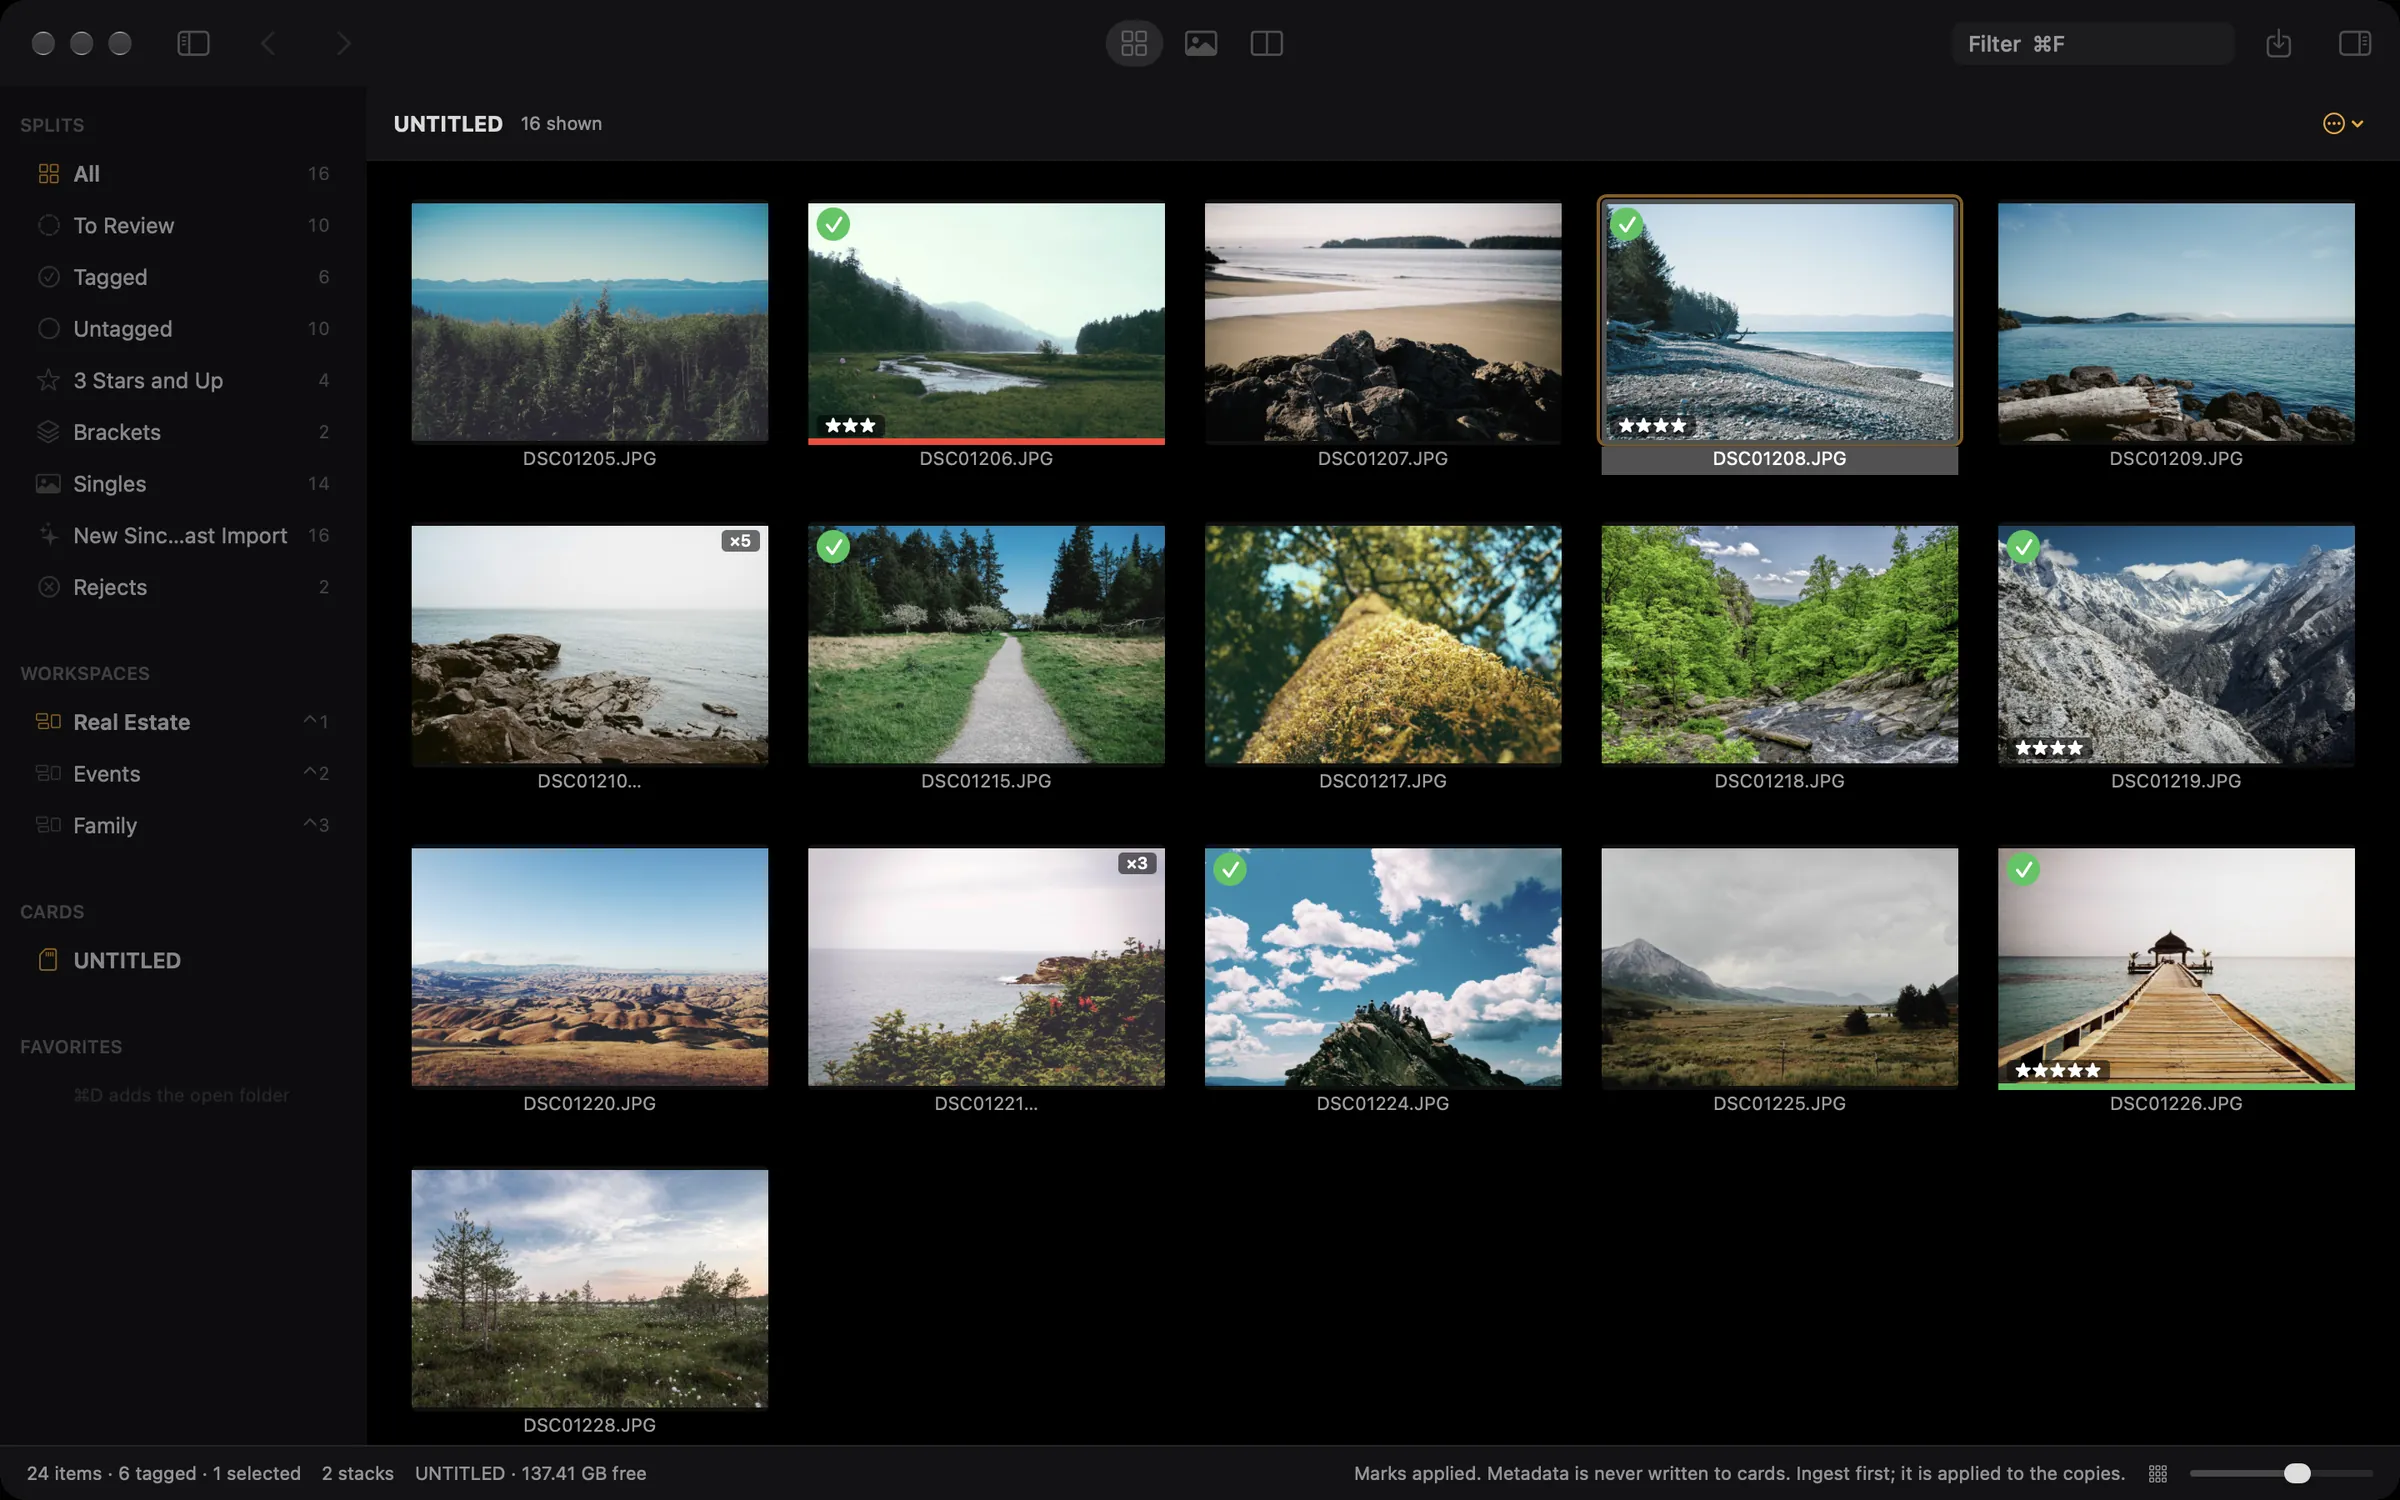
Arrow keys move, ⇧ extends the selection, and ⌘ with an arrow moves the focus ring without disturbing what is selected. ⌘+ and ⌘- resize the thumbnails, and so does a pinch.
Photographs are ordered by when they were taken, down to the fraction of a second, so two cameras at the same event interleave correctly. You can sort by filename instead from the palette.
Which files are supported, and what happens to the rest, is on the support page.
The preview
Space opens the large view, and Space again closes it. ⌘1, ⌘2, and ⌘3 switch between grid, preview, and both at once.
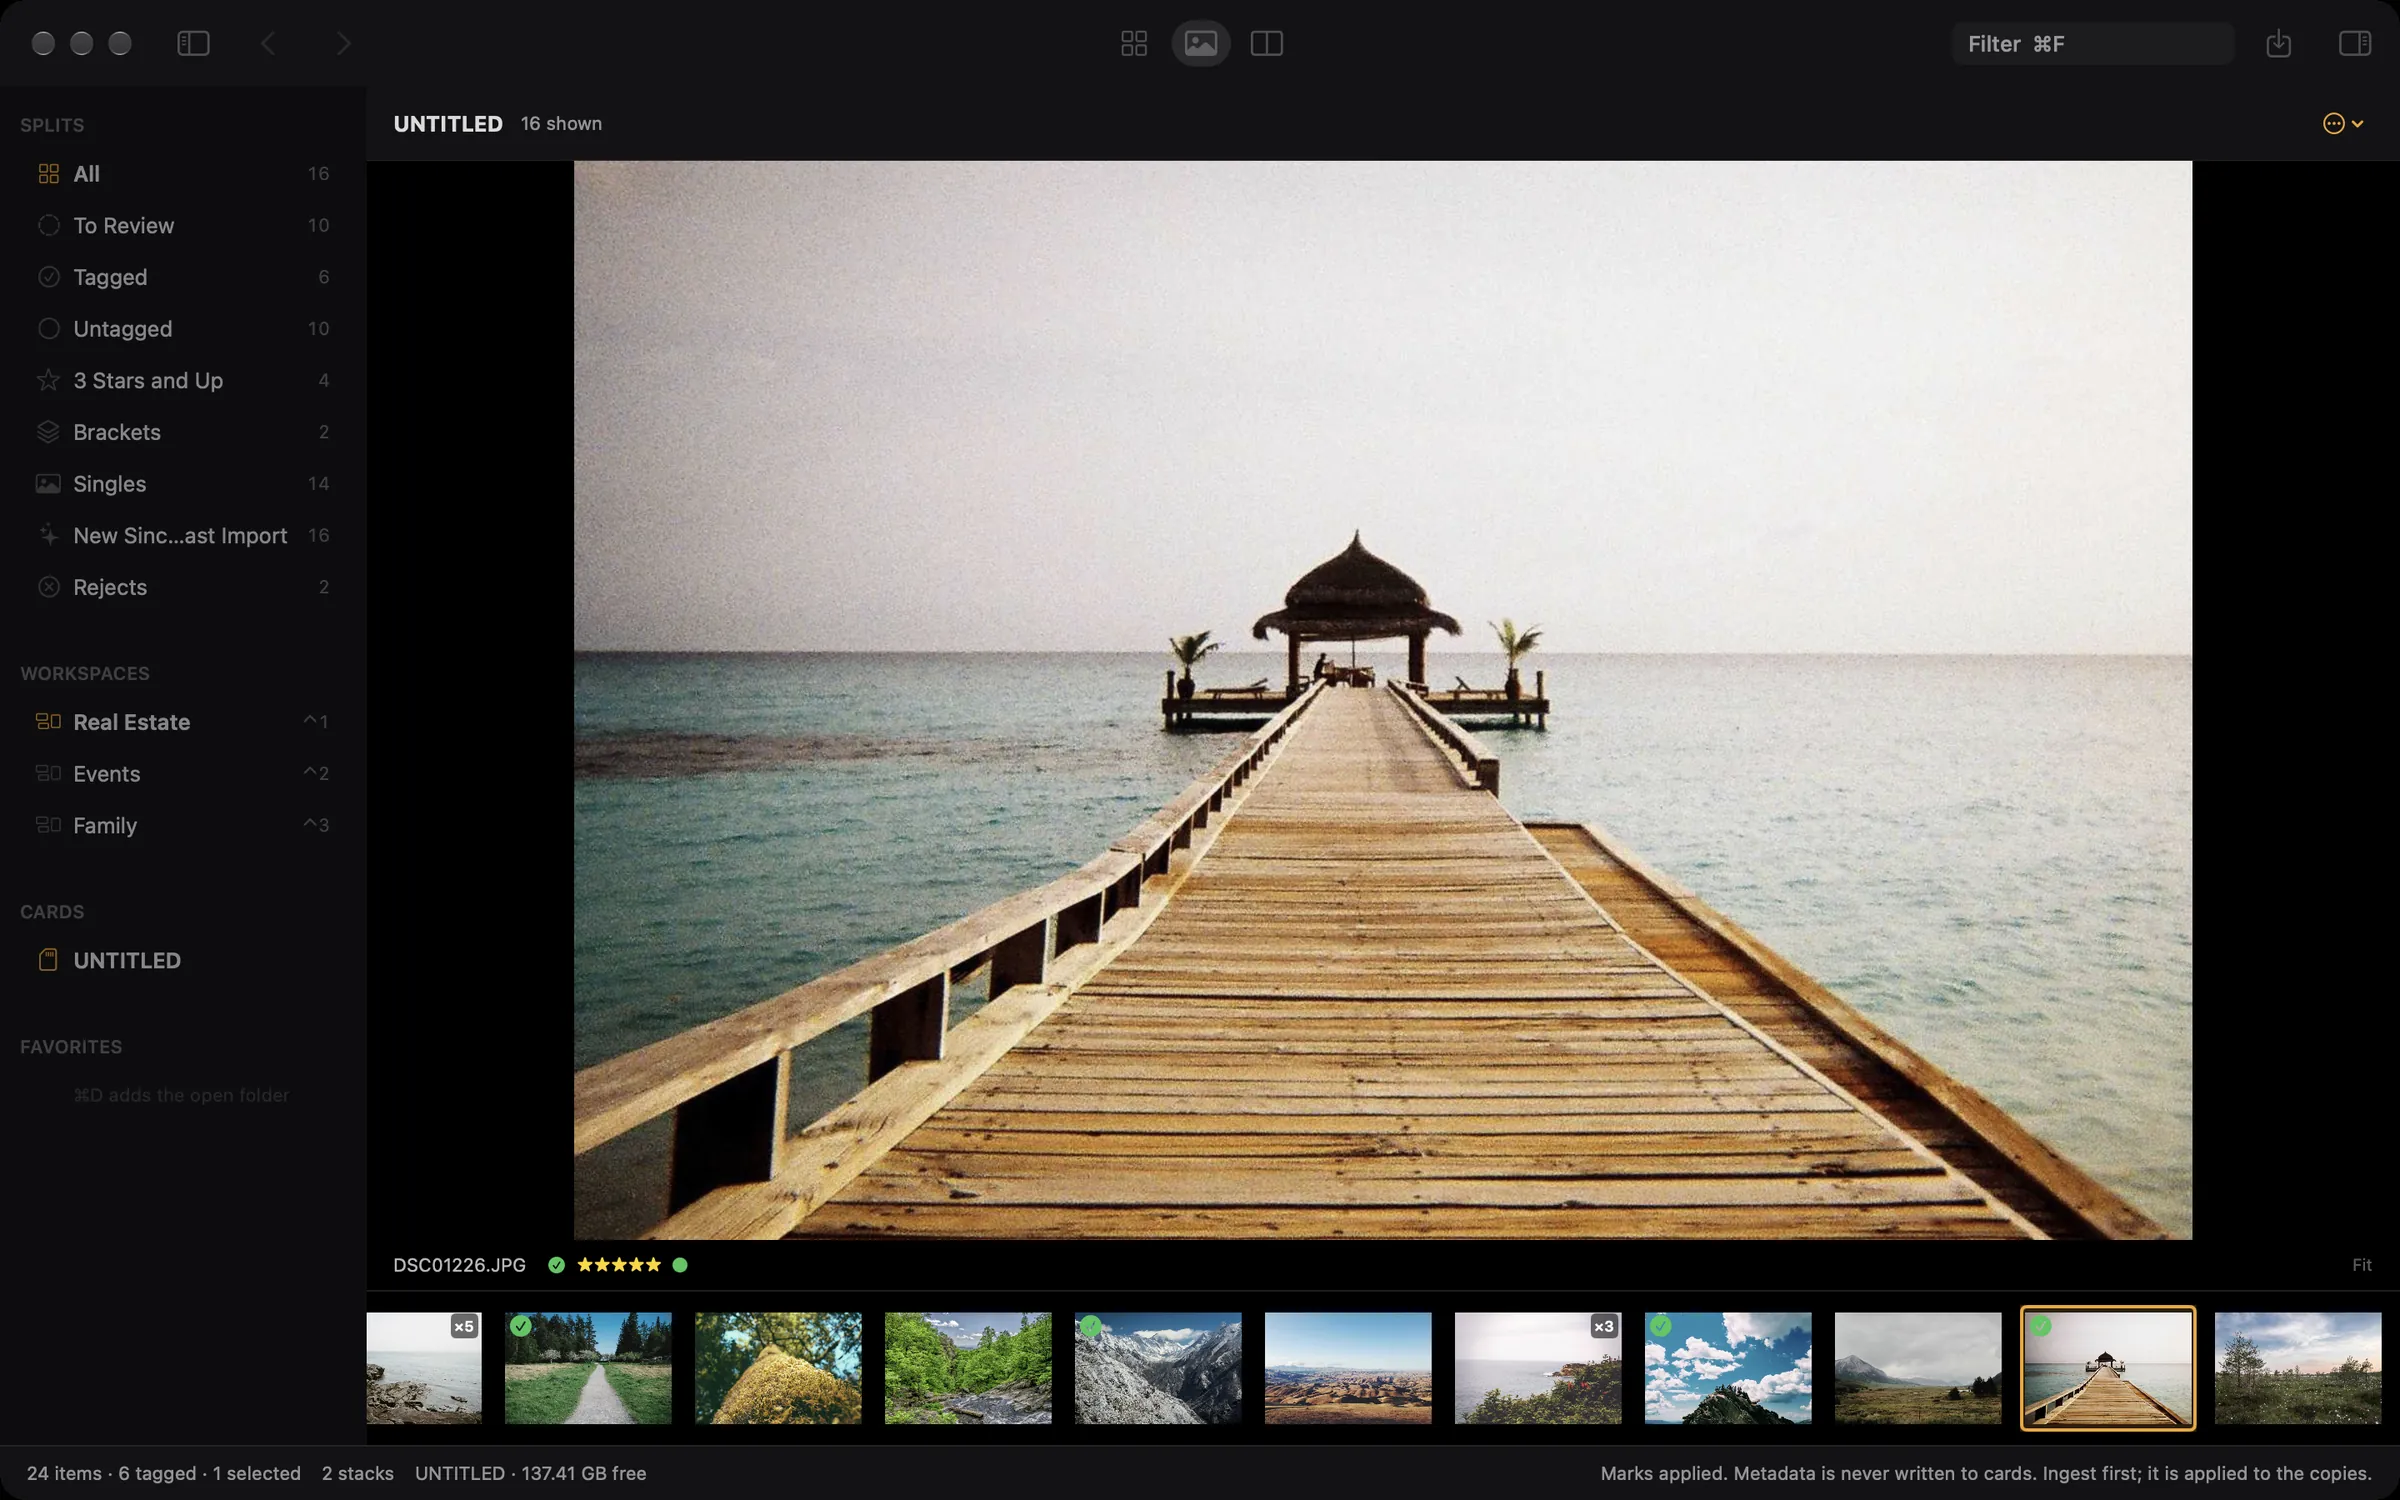
Z goes to 100 per cent at the pointer, so whatever is under the cursor stays under the cursor, and Z again returns to fit. ⌥1, ⌥2, and ⌥4 are fixed zoom levels, and F fits. A pinch, a two finger drag, and a two finger double tap do the same things.
The zoom is sticky as you move between photographs, which is the point: you set 100 per cent on an eye, then arrow through five frames and compare the same eye in each.
At 100 per cent Ingest shows the full size JPEG from inside the raw file, which for a Sony body is the whole 9504 pixel frame. When a raw file's preview is smaller than its JPEG twin, Ingest uses the twin, and the information overlay tells you which pixels you are actually judging.
Compare and survey
C puts two photographs side by side. N shows up to four. Zoom and pan are locked across the panes, so zooming into a face in one zooms into the same place in the others, which is the only way to judge two nearly identical frames.
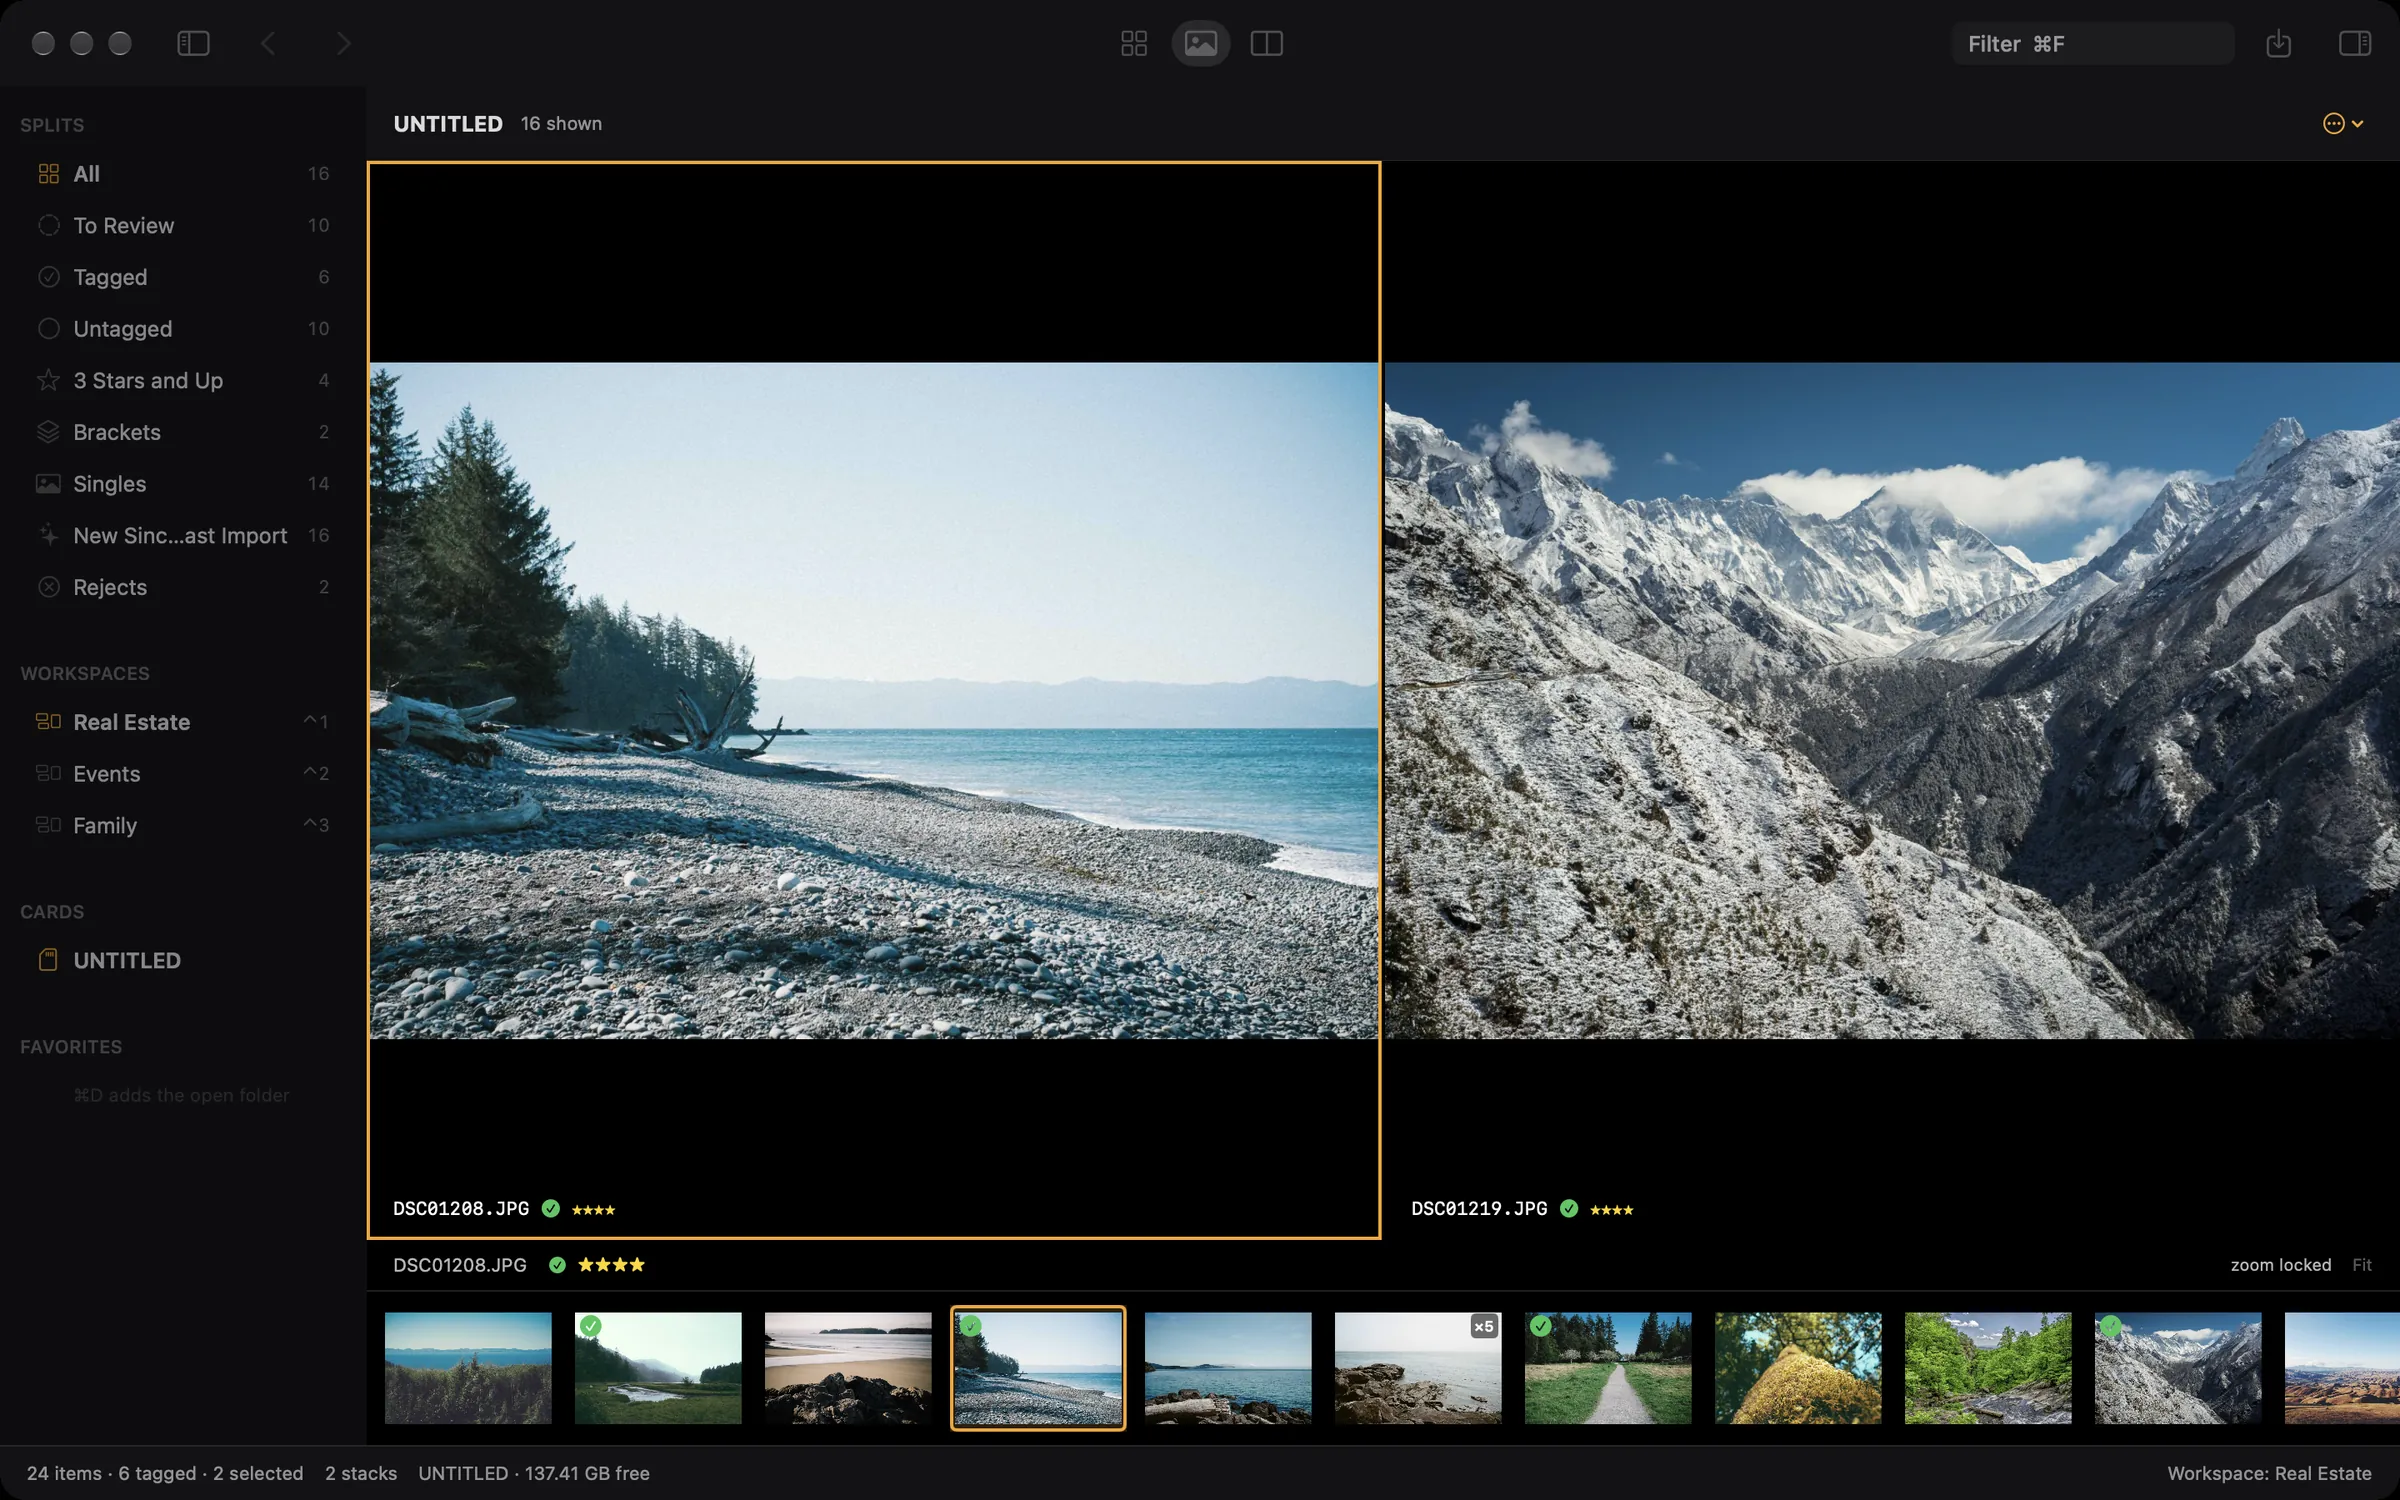
Marking keys act on the highlighted pane, so you can reject the loser without leaving the comparison. Esc leaves.
On a bracket set, C opens every frame at once, which is how you check whether the window is blown in all five.
Overlays
I cycles the information panel: off, the exposure, then everything including the pixel size being displayed. That last part matters, because it tells you whether you are looking at a small preview or the full size image.
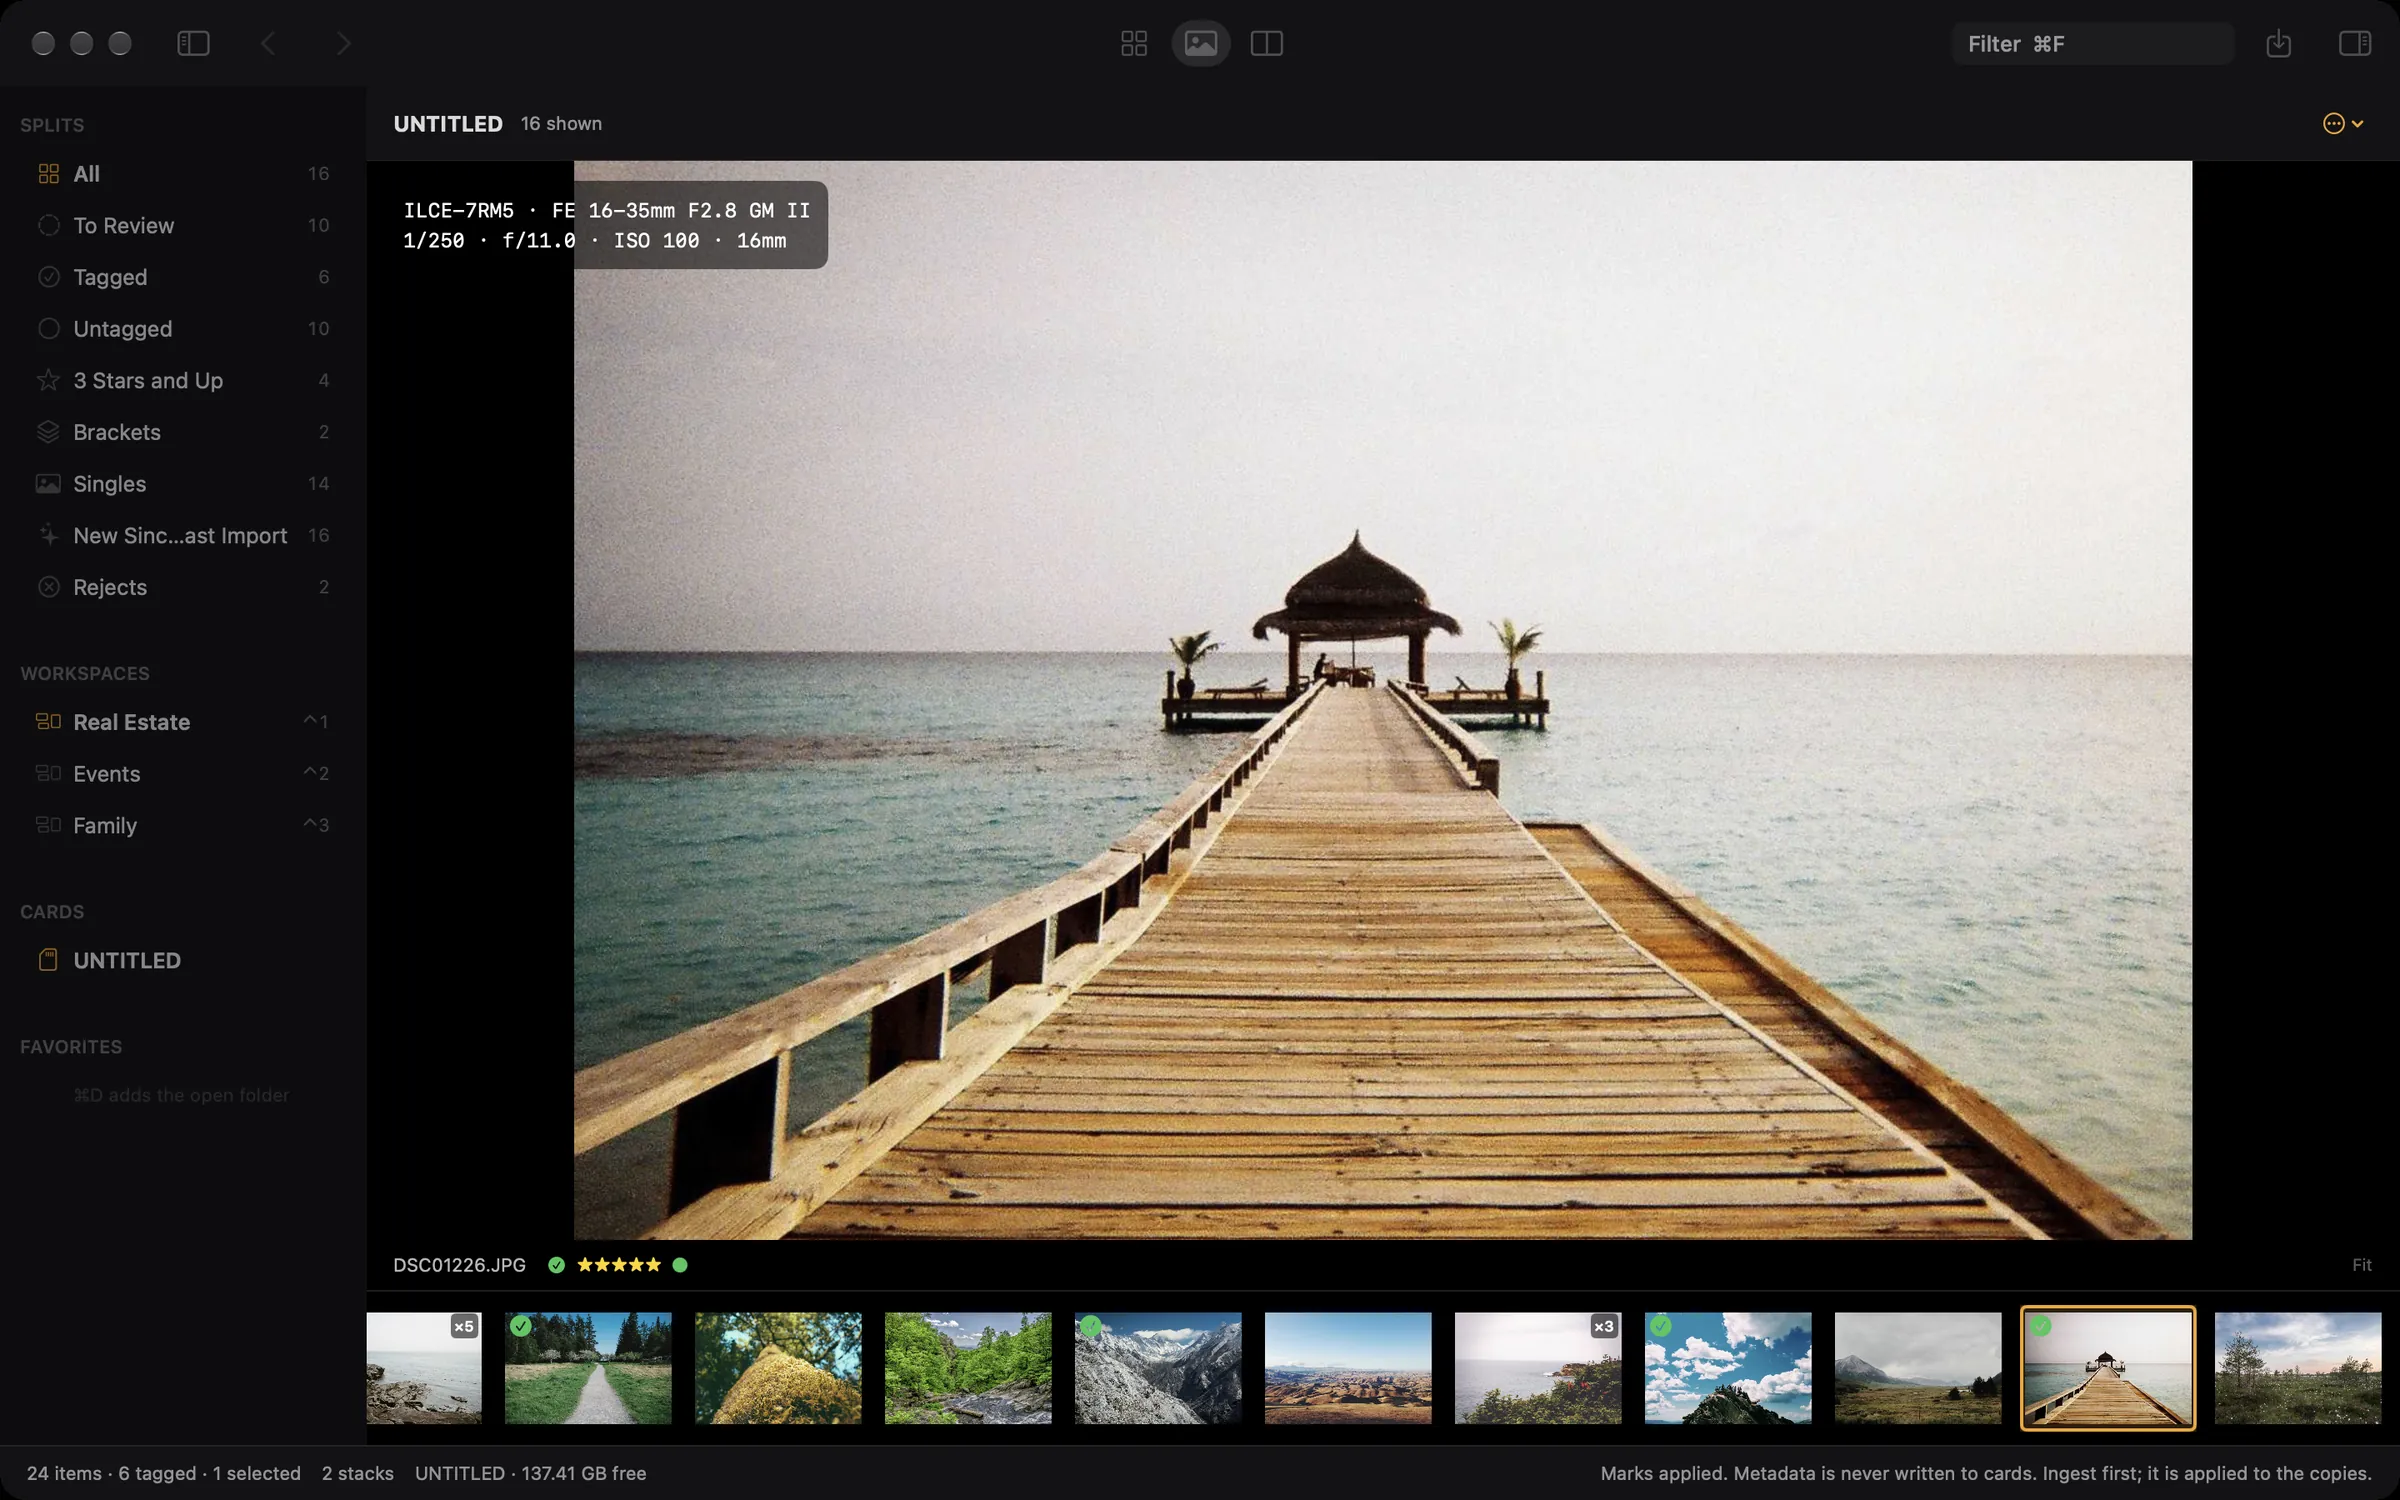
| Key | Overlay |
|---|---|
| I | Camera, lens, exposure, and what size image is on screen. |
| ⌥D | Detail. Turns the image into pure edge contrast, which makes soft frames obvious. |
| ⌥E | Edges, drawn in colour over the photograph. |
| ⌥A | The focus point the camera recorded, when it recorded one. Sony and Fujifilm both do; it is hidden when the camera did not. |
| ⌥F | Face close-ups along the bottom, each cropped at full size so you can check the eyes without zooming. |
The face strip finds faces on your Mac, using Apple's Vision framework, only so it can enlarge them. No names, no identities, nothing stored, nothing sent. It runs only while the strip is open.
Bracket stacks
A three or five shot bracket is one picture taken several times. Ingest recognises those sets and shows them as a single cell with a badge, so a card of a hundred brackets looks like twenty pictures instead of a hundred frames.
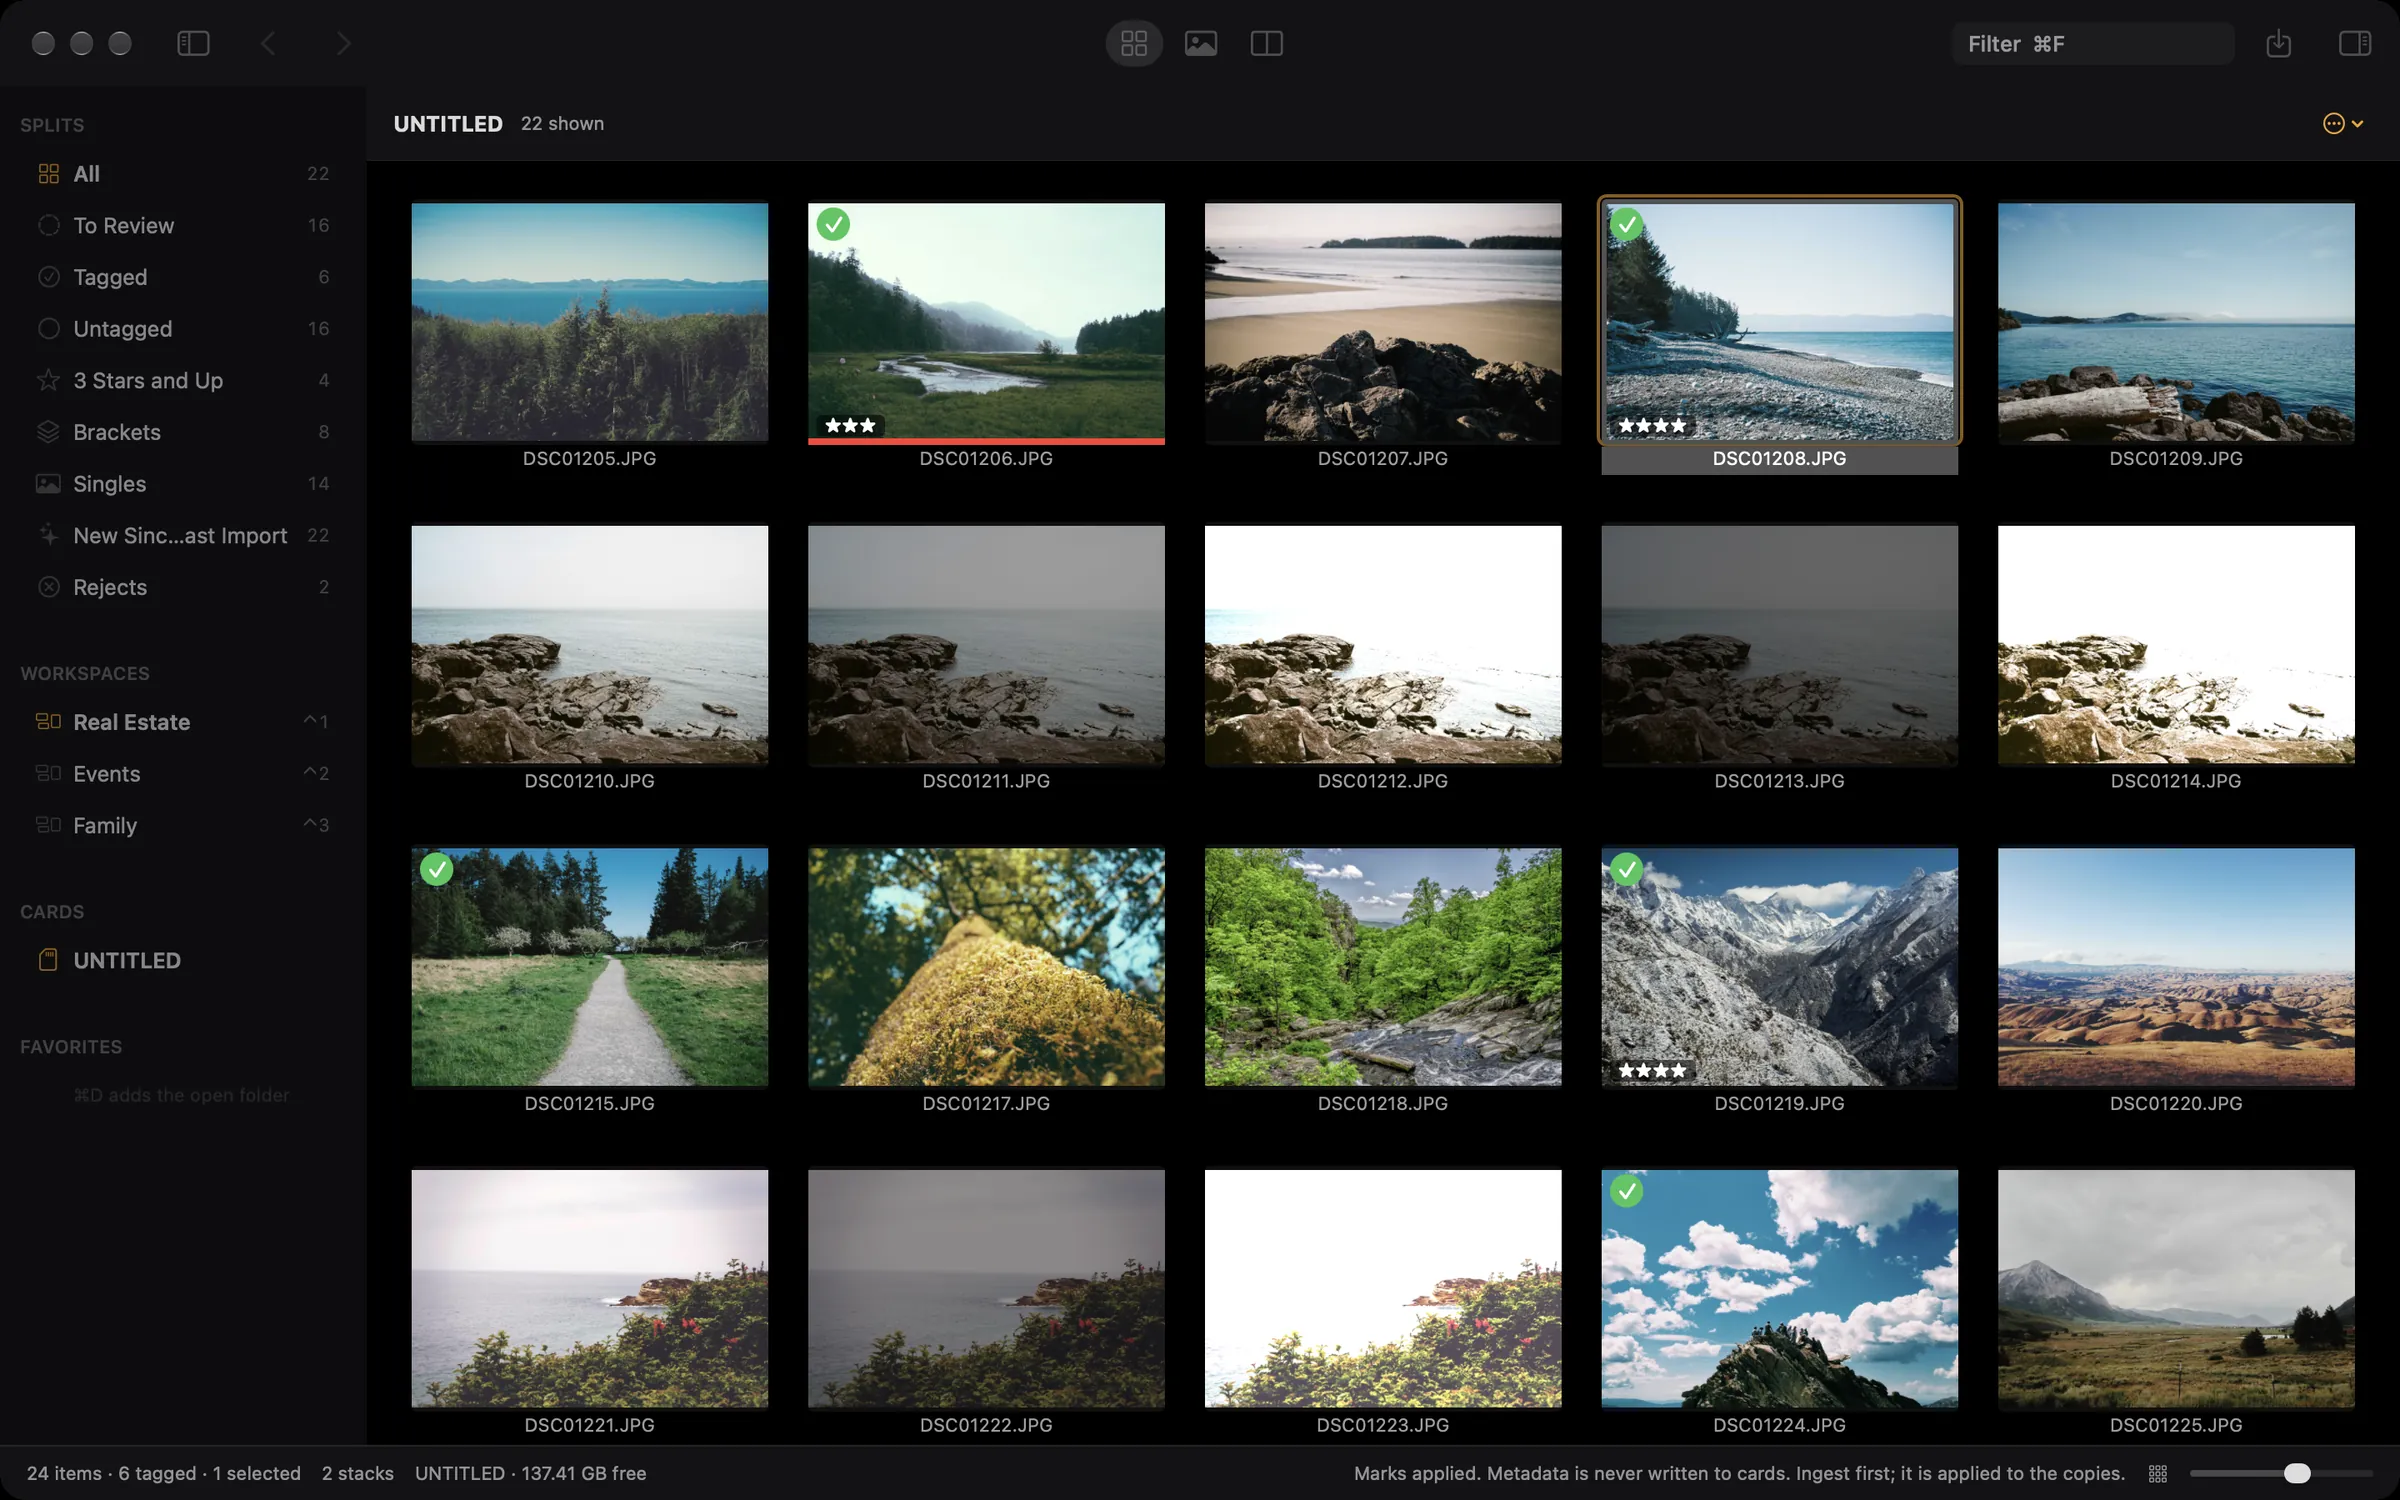
S expands or collapses the set you are on, ⌥S does all of them. A mark on a collapsed set applies to every frame in it, so tagging the bracket keeps the whole bracket.
Sets are found two ways. Sony writes a flag saying the frames were an auto bracket, which is definitive. Fujifilm does not, so Ingest looks for frames taken a fraction of a second apart with the same aperture and ISO and a clean spread of shutter speeds. Sets of three, five, seven, and nine are recognised, and an incomplete set is still stacked and marked as incomplete rather than quietly hidden.
If it gets one wrong, fix it. Select frames and combine them into a stack, or uncombine one. Your corrections are remembered for that folder. Stacking can be turned off per folder with ⌥⌘K.
A RAW and JPEG pair is handled separately: by default the two files show as one photograph, and marking or copying acts on both. ⌥⌘J turns that off for a folder when you want to see them apart.
Video
Clips sit in the grid alongside the photographs with a poster frame and their length. Space plays. J, K, and L shuttle the way they do in every editor, , and . step a frame, and M mutes.
↑ and ↓ always move to the next item rather than doing something to the video, so a clip never traps you in the middle of a cull.
Sony clips carry a small sidecar file with the real creation time. Ingest reads it, so clips sort into the right place among the photographs, and it copies the sidecar alongside the clip when you ingest.
Culling
Four kinds of mark, and they are all one key. T tags a keeper. X rejects. 1 to 5 set stars, and pressing the star count it already has clears it. 6 to 9 set the Lightroom colours, with ⌥9 for purple.
By default a mark acts where you are and stays there, which is what Photo Mechanic does and what most people want when they are rating. Turn on advancing in Settings, Culling and the loop becomes one key per photograph: T to keep, → to skip. Holding ⇧ with any marking key does the opposite for that one press.
Everything is undoable. ⌘Z puts back a mark, a batch of marks, or a stack you took apart.
Tags and rejects live in Ingest. Stars and colour labels are written into the photographs themselves, in the background, a couple of seconds after you stop typing, so Lightroom sees them when it imports. On a card nothing is written at all; the marks are remembered and applied to the copies during the ingest.
Rejects are hidden by default, and the toggle for that sits in the toolbar where you can see it, so photographs never disappear without the app saying so. ⇧⌘⌫ empties them: to a folder beside the source, or to the Trash, and on a card only after a confirmation, because cards have no Trash.
Splits
A split is a saved view with a live count, sitting in the sources list. Ingest comes with the ones you always want: everything, still to review, tagged, untagged, three stars and up, brackets, singles, video, rejects, and what is new since the last time you imported from this card.
The counts update as you mark, which turns culling into something you can see the end of. ⌥Tab steps through the splits.
Set up a filter you like and press ⇧⌘S to save it as your own split. Settings, Splits lets you edit one, give it an icon, or hide the built-in ones you never use.
Filters behave: they survive going in and out of the preview, they wrap where you expect, and marking the last photograph out of a view returns you to everything rather than leaving you in an empty room.
Metadata
Ingest writes keywords, captions, titles, creator, copyright, ratings, colour labels, and GPS into the photographs, in the fields Adobe and Apple read. Not into a sidecar file, because Apple Photos ignores those.
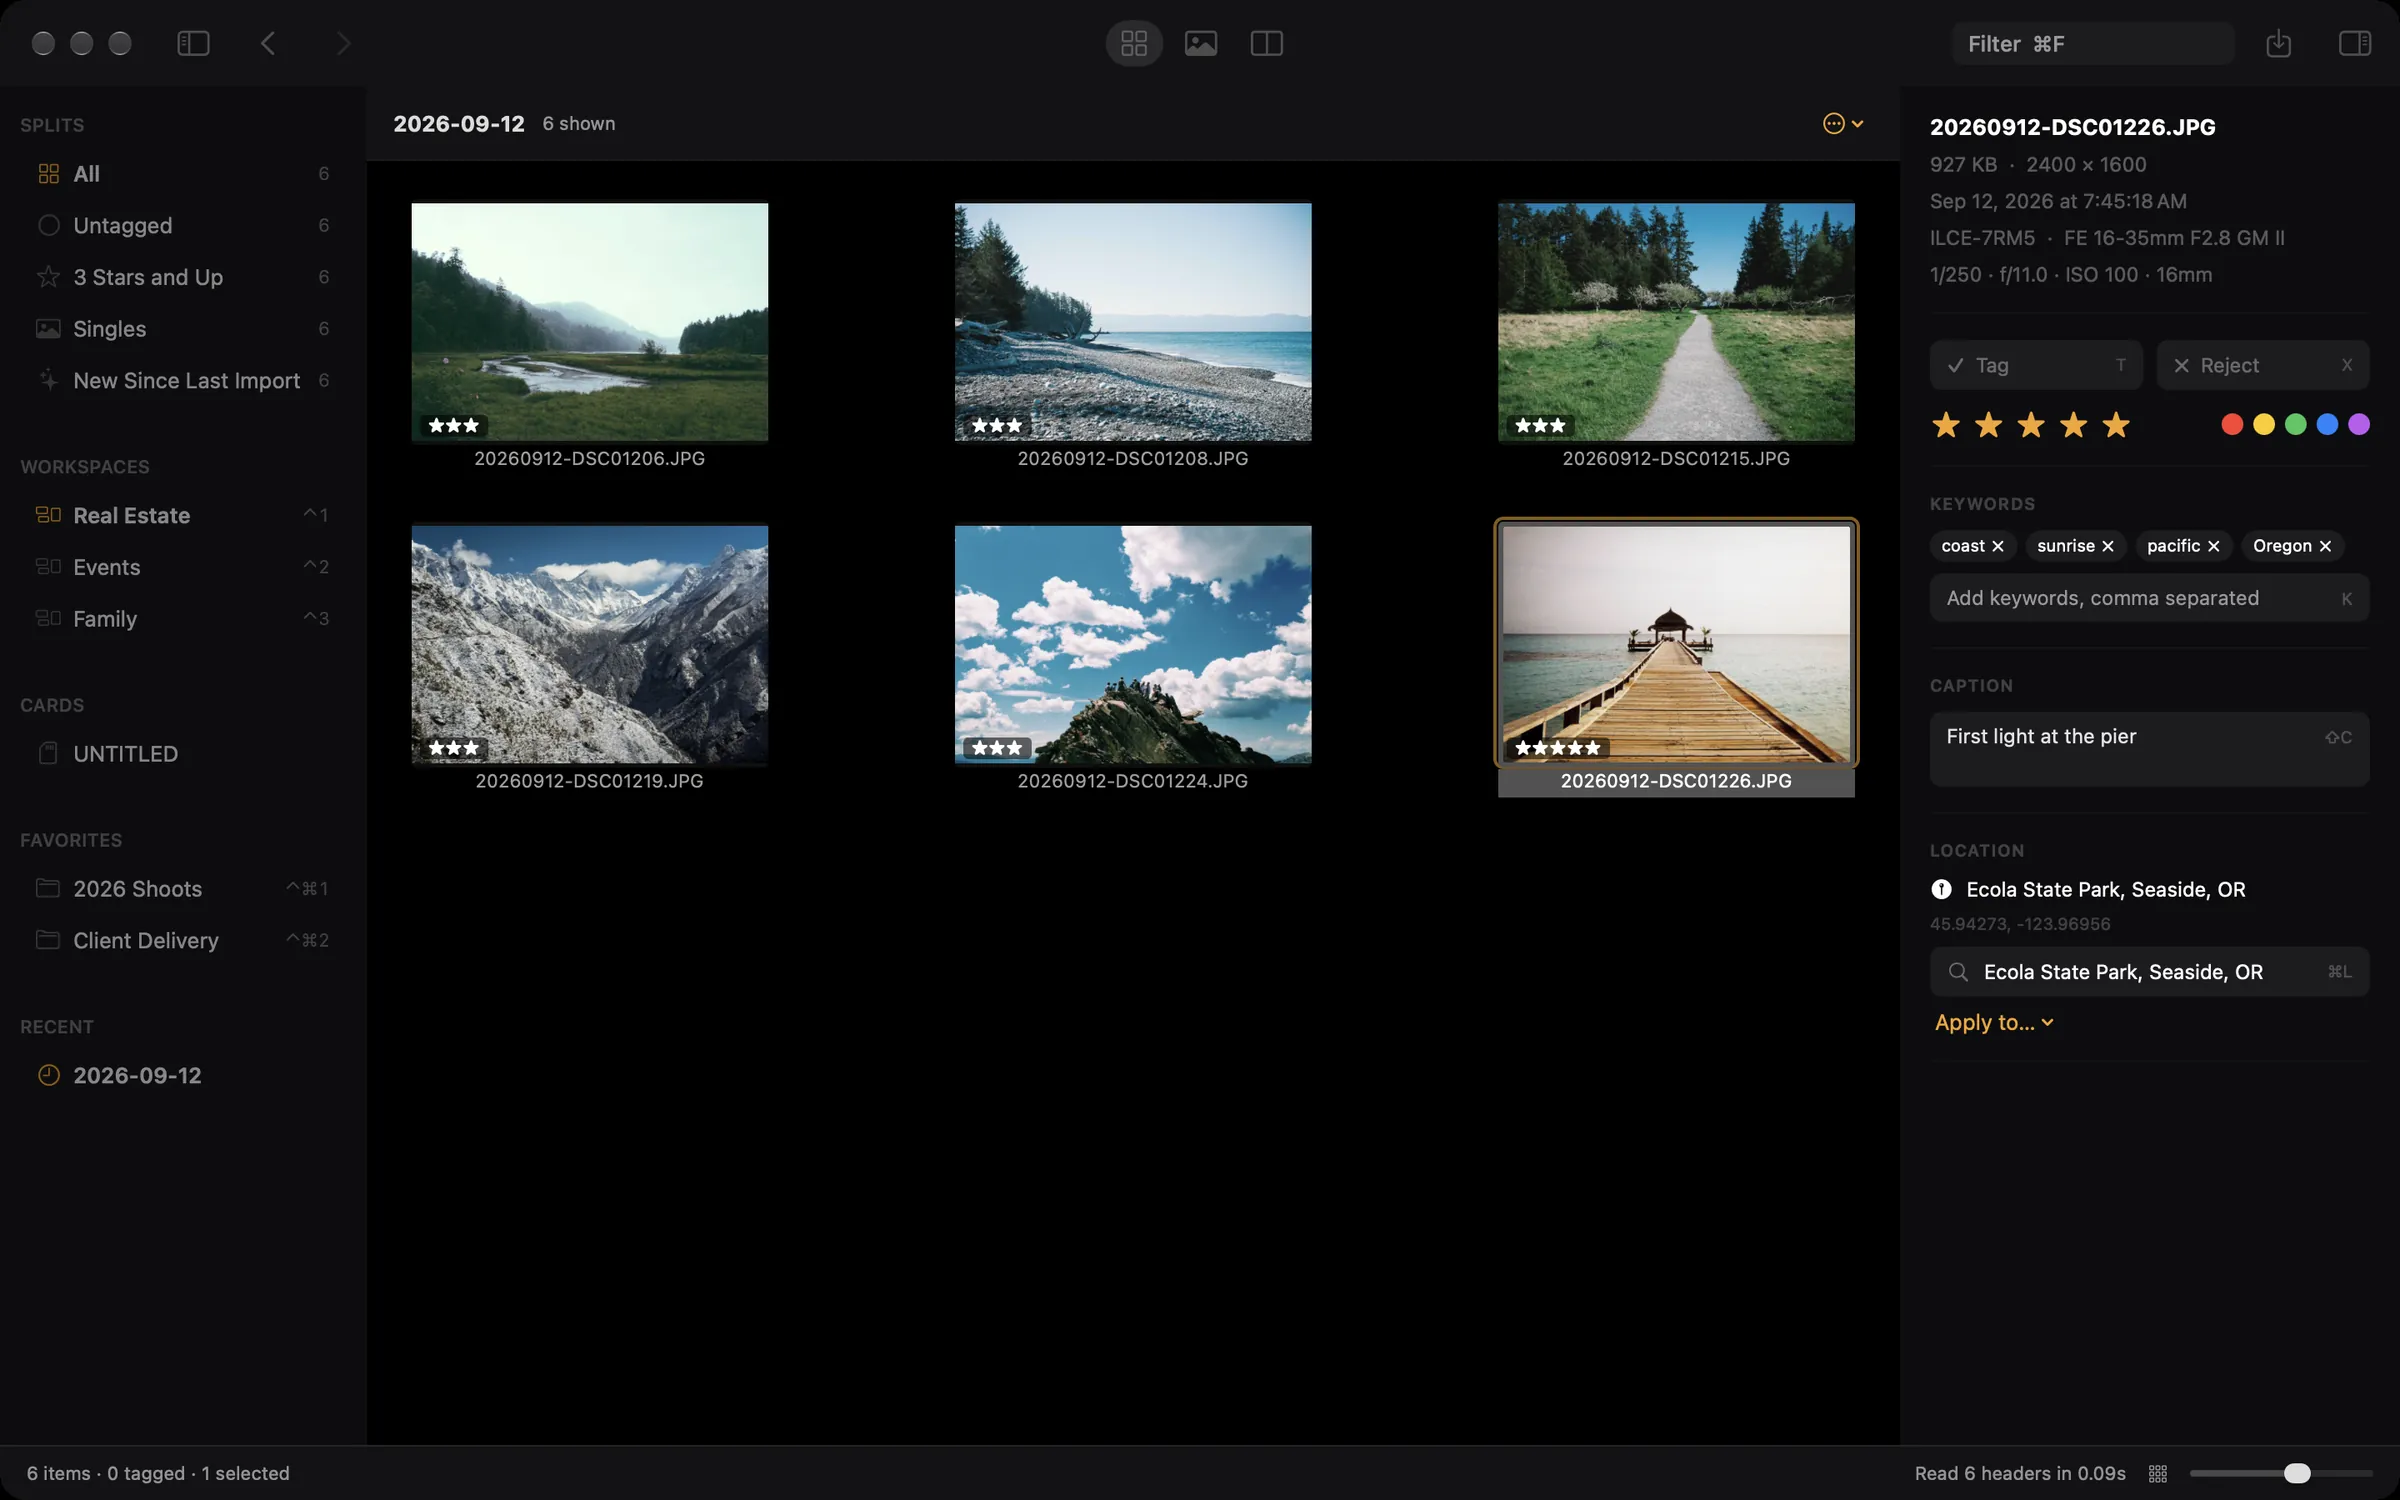
The inspector is the slow way, and it is open with ⌘I. K puts the cursor straight in the keyword field, which completes from every keyword you have ever used. ⇧C goes to the caption. ⇧K takes back the keywords you just added, which is the one you will want after applying the wrong thing to forty photographs.
Every write is checked. Ingest keeps the tool's backup of the file until it has read the file back and confirmed the new value, then removes the backup. If the read back does not match, the original is put back. That is why writing metadata to a hundred files takes a moment.
Never to a card. Whatever you type while culling a card is remembered and applied to the copies as they land, after they have been verified.
Quick entry
Fields are slow. Q opens one line that takes all of it at once: coast sunrise 3* red "First light at the pier" @Ecola State Park /personal sets two keywords, three stars, a red label, a caption, a location, and a preset.
It is deliberately forgiving about order and punctuation, and the legend stays on screen while you type. The full syntax is on the naming page, along with snippets, which let you type ;addr instead of a sentence you use every day.
Presets
A metadata preset is a named set of fields to apply together: keywords, a caption, a title, your creator and copyright, and optionally a location. M shows the list with what each one would change, and ⇧⌘M applies the last one again without asking.
Each field chooses whether it replaces what is there or leaves an existing value alone, so a preset can fill in the blanks on a hundred photographs without overwriting the captions you wrote by hand. Keywords can add to what is there rather than replace it.
Captions and titles can use the tokens, so a preset with the caption {address} writes the right address on every photograph of every job, for ever, without being edited.
A preset can also be chosen in the Ingest sheet, which applies it to the copies as they arrive. That is usually the right moment, because the card stays untouched and the work happens once.
Locations
⌘L searches for an address and sets it as the job location. Choose the result and the coordinates are attached, then Apply to the selection, to everything tagged, or to everything.
Ingest writes the GPS coordinates in the EXIF fields Apple Photos reads, so a pin appears on the map, and the city, state, and country in the fields Lightroom reads, so a search for a city finds the photographs. Both at once, from one address.
⇧⌘L strips every location field back out, which is the one to know before sending photographs of your house to a stranger. Address search is the one part of the app that talks to the network, and it only does so while you are typing in that field. The privacy page has the detail.
Destinations
Favourites are the folders you copy into. ⌘D adds the one you are looking at, and you can drop folders onto the list from Finder. Their order matters: the first nine get a number, and that number picks them inside the Ingest sheet with ⌘1 to ⌘9 and opens them from anywhere with ⌃⌘1 to ⌃⌘9.
An ingest can write to two destinations at once. The second copy is made from the first one after it has been verified, and it is checked the same way.
Under Settings, Destinations there is a card called Ingest starts with. That is the memory of what you used last, in editable form, so a repeat card can be ⌘G and then Return.
Renaming
Names are built from templates: text plus tokens in braces. {yyyy}{mm}{dd}-{seqn} gives 20260912-7078. The full list of tokens, and how the sequence number that never repeats works, is on the naming page.
Renaming happens during an ingest, or in place afterwards with ⌘R. ⌥⌘R re-sequences what is on screen, which is how you close the gaps in the numbering after throwing half a shoot away.
Every rename records the original filename inside the file, so Undo Rename can put the old names back later, even in a folder you opened fresh.
Ingesting
⌘G opens the sheet. It fills itself in from what you did last and from the workspace you are in, so most of the time the answer is Return.
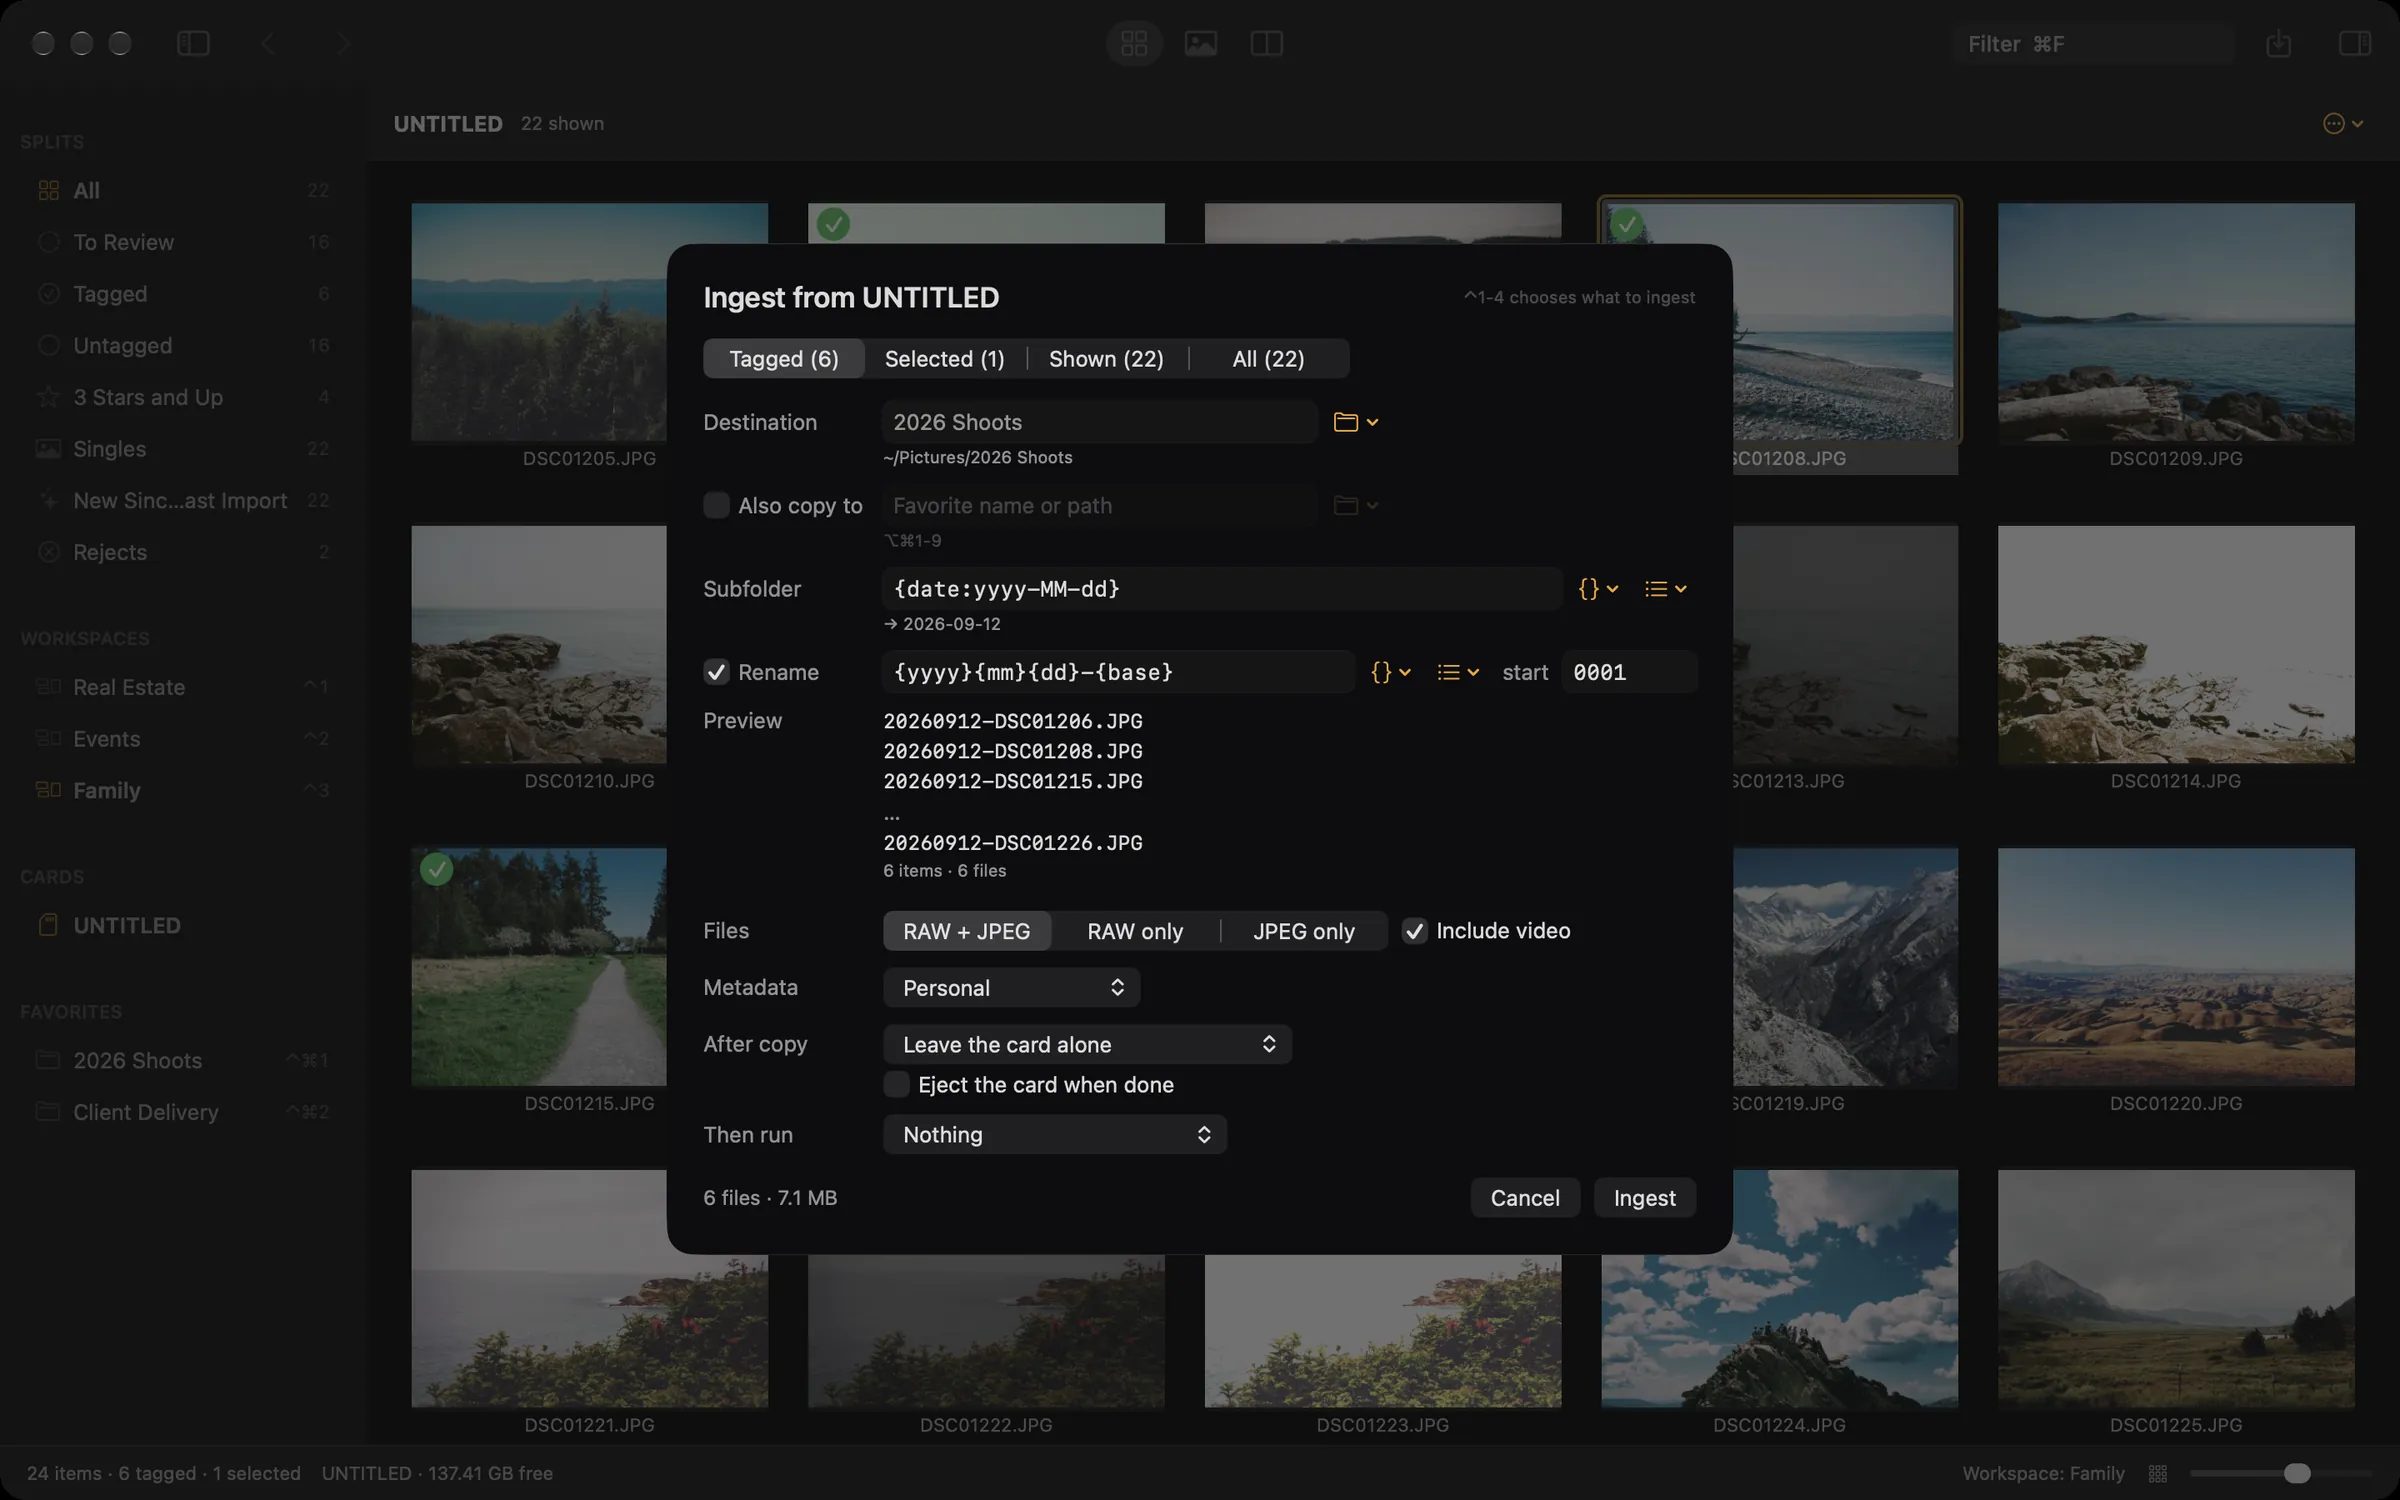
The tabs at the top choose what to copy, with the count on each one: tagged, selected, what is on screen, or everything. ⌃1 to ⌃4 pick them without the mouse. The cursor starts in the destination field, where you can type part of a favourite's name.
Below that: an optional second destination, a subfolder named by template, renaming with a live preview of the actual filenames, which of a RAW and JPEG pair to take, a metadata preset to apply to the copies, and what to do with the card afterwards.
What happens when you press Ingest:
- Each file is copied to a temporary name and flushed to disk.
- The copy is read back and compared to the source. If they differ, that file is not published and the ingest says so.
- The verified copy is given its real name, in a way that cannot overwrite an existing file even if one appeared a moment ago.
- A second destination is copied from the first and checked the same way.
- Metadata and marks are written to the copies.
- A record of the job is saved, so Ingest can tell you later which photographs from this card you have already taken.
- Only then, if you asked for it, are files deleted from the card, and only the ones whose copies verified everywhere.
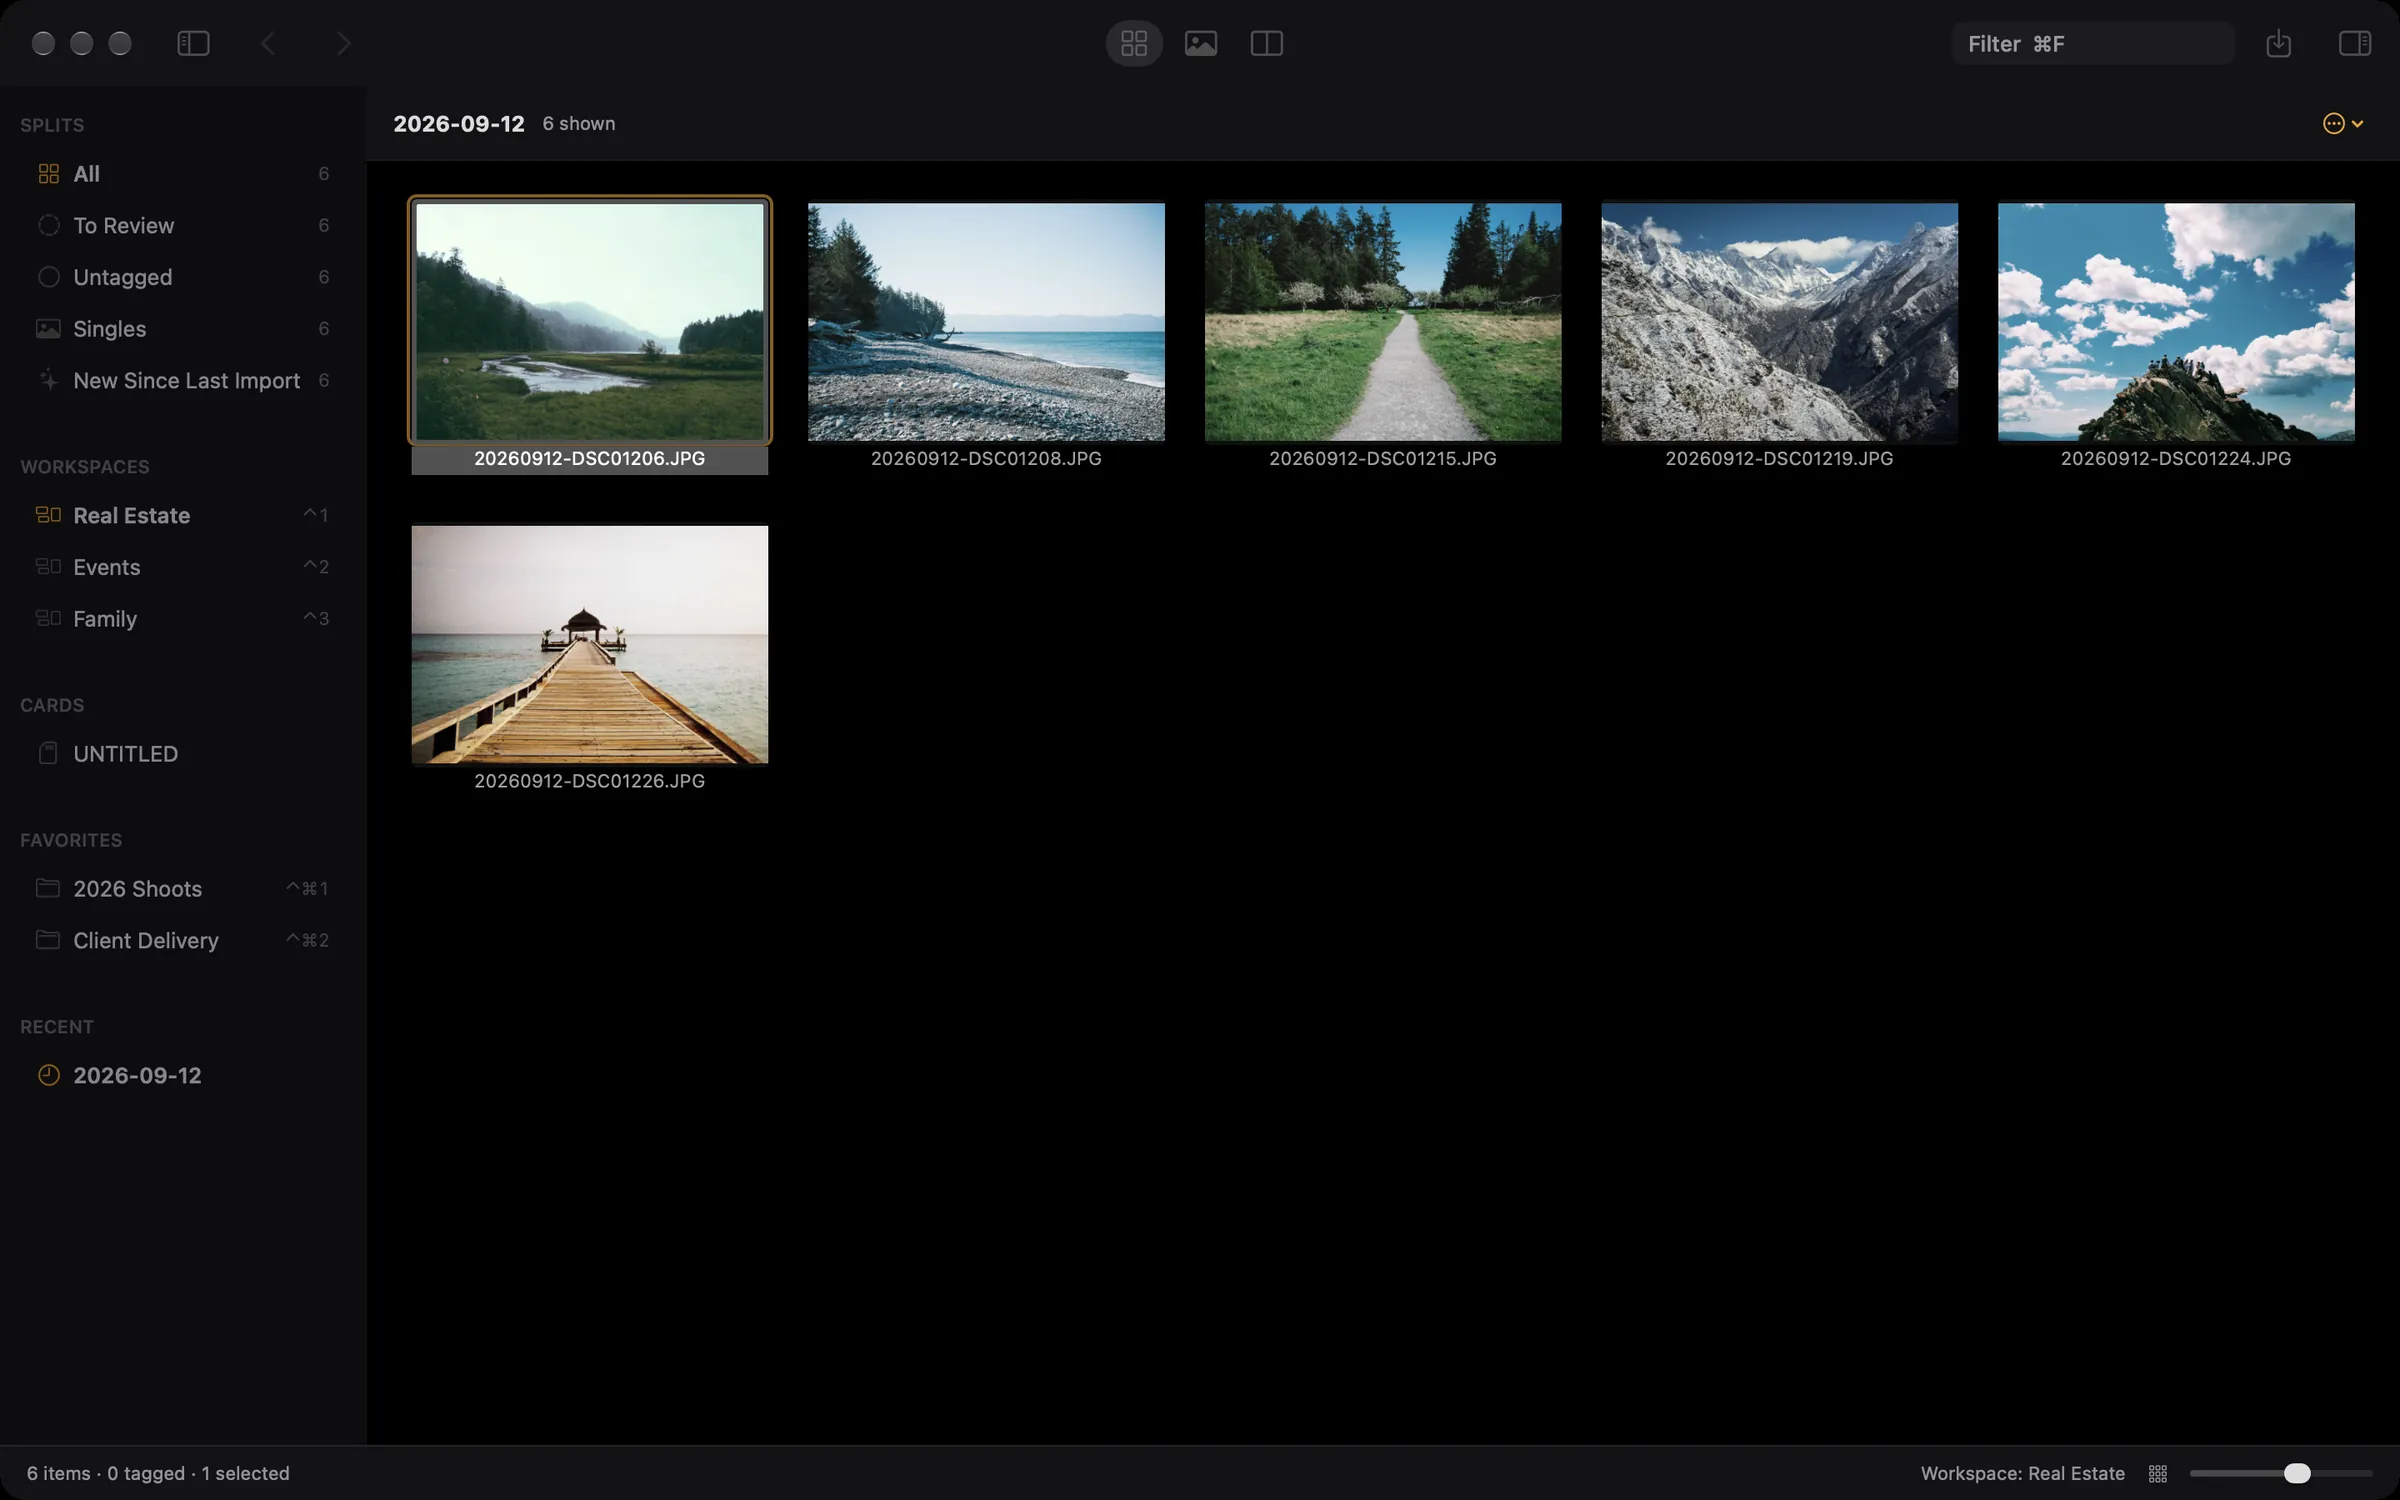
Cancelling keeps what was already copied and verified, and the sequence number only advances by the files actually named. A card that was half emptied last time is not a problem either: the photographs you already took are marked, and the New Since Last Import split shows you the rest.
Actions
An action is a list of steps that runs when the copy is finished: open the files in Lightroom, import them into an Apple Photos album, copy them somewhere else, run a Shortcut, run a script. You choose one in the Ingest sheet under Then run.
They are built in Settings, Actions, with a button that runs one on the current selection so you can test it without waiting for a card. The detail, including what a script gets handed, is on the automation page.
Workspaces
Different shoots want different defaults. A workspace is a named set of them: the view you start in, the sort, the thumbnail size, whether brackets stack and pairs combine, and the name template, subfolder, metadata preset, and destination the Ingest sheet should start with.
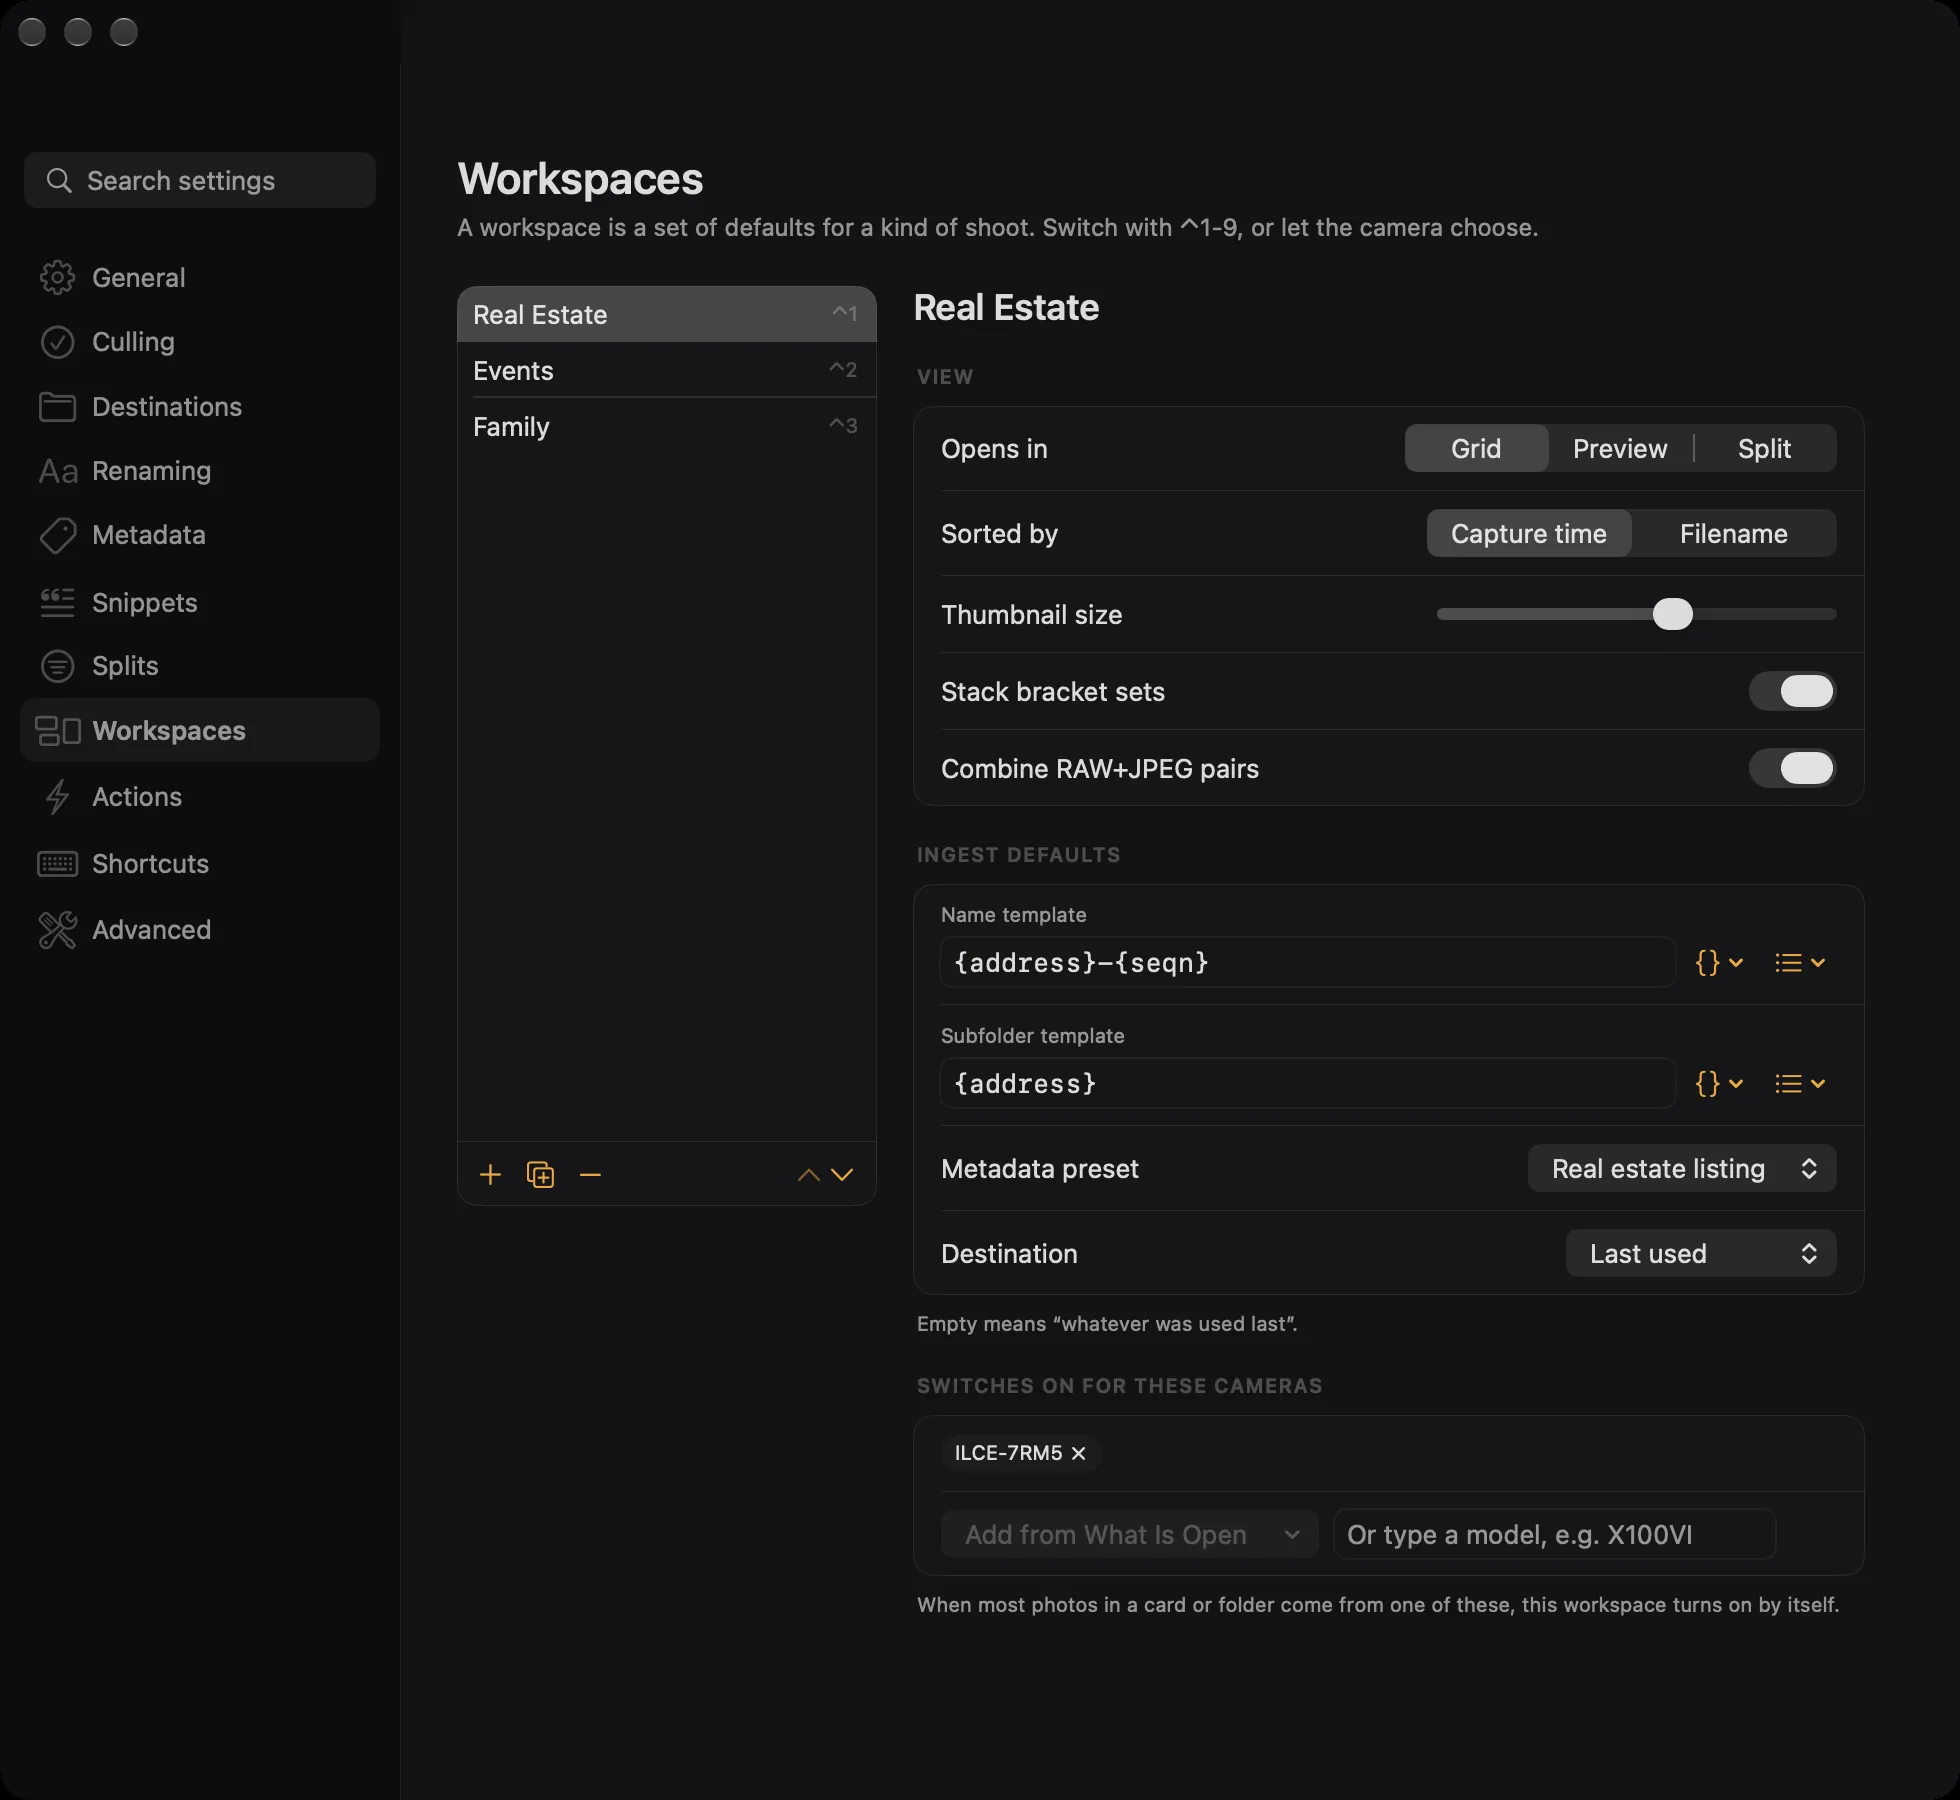
⌃1 to ⌃9 switch between them. Better than that, each one can list the cameras it belongs to. Open a card and Ingest looks at what most of the photographs came from, and switches for you. A card from the Sony arrives as a job, a card from the Fuji arrives as family photographs, and you did nothing.
The palette
⌘K opens a search field over everything the app can do. Type a few letters of a command, an alias, or a category. Arrow keys move, Return runs.
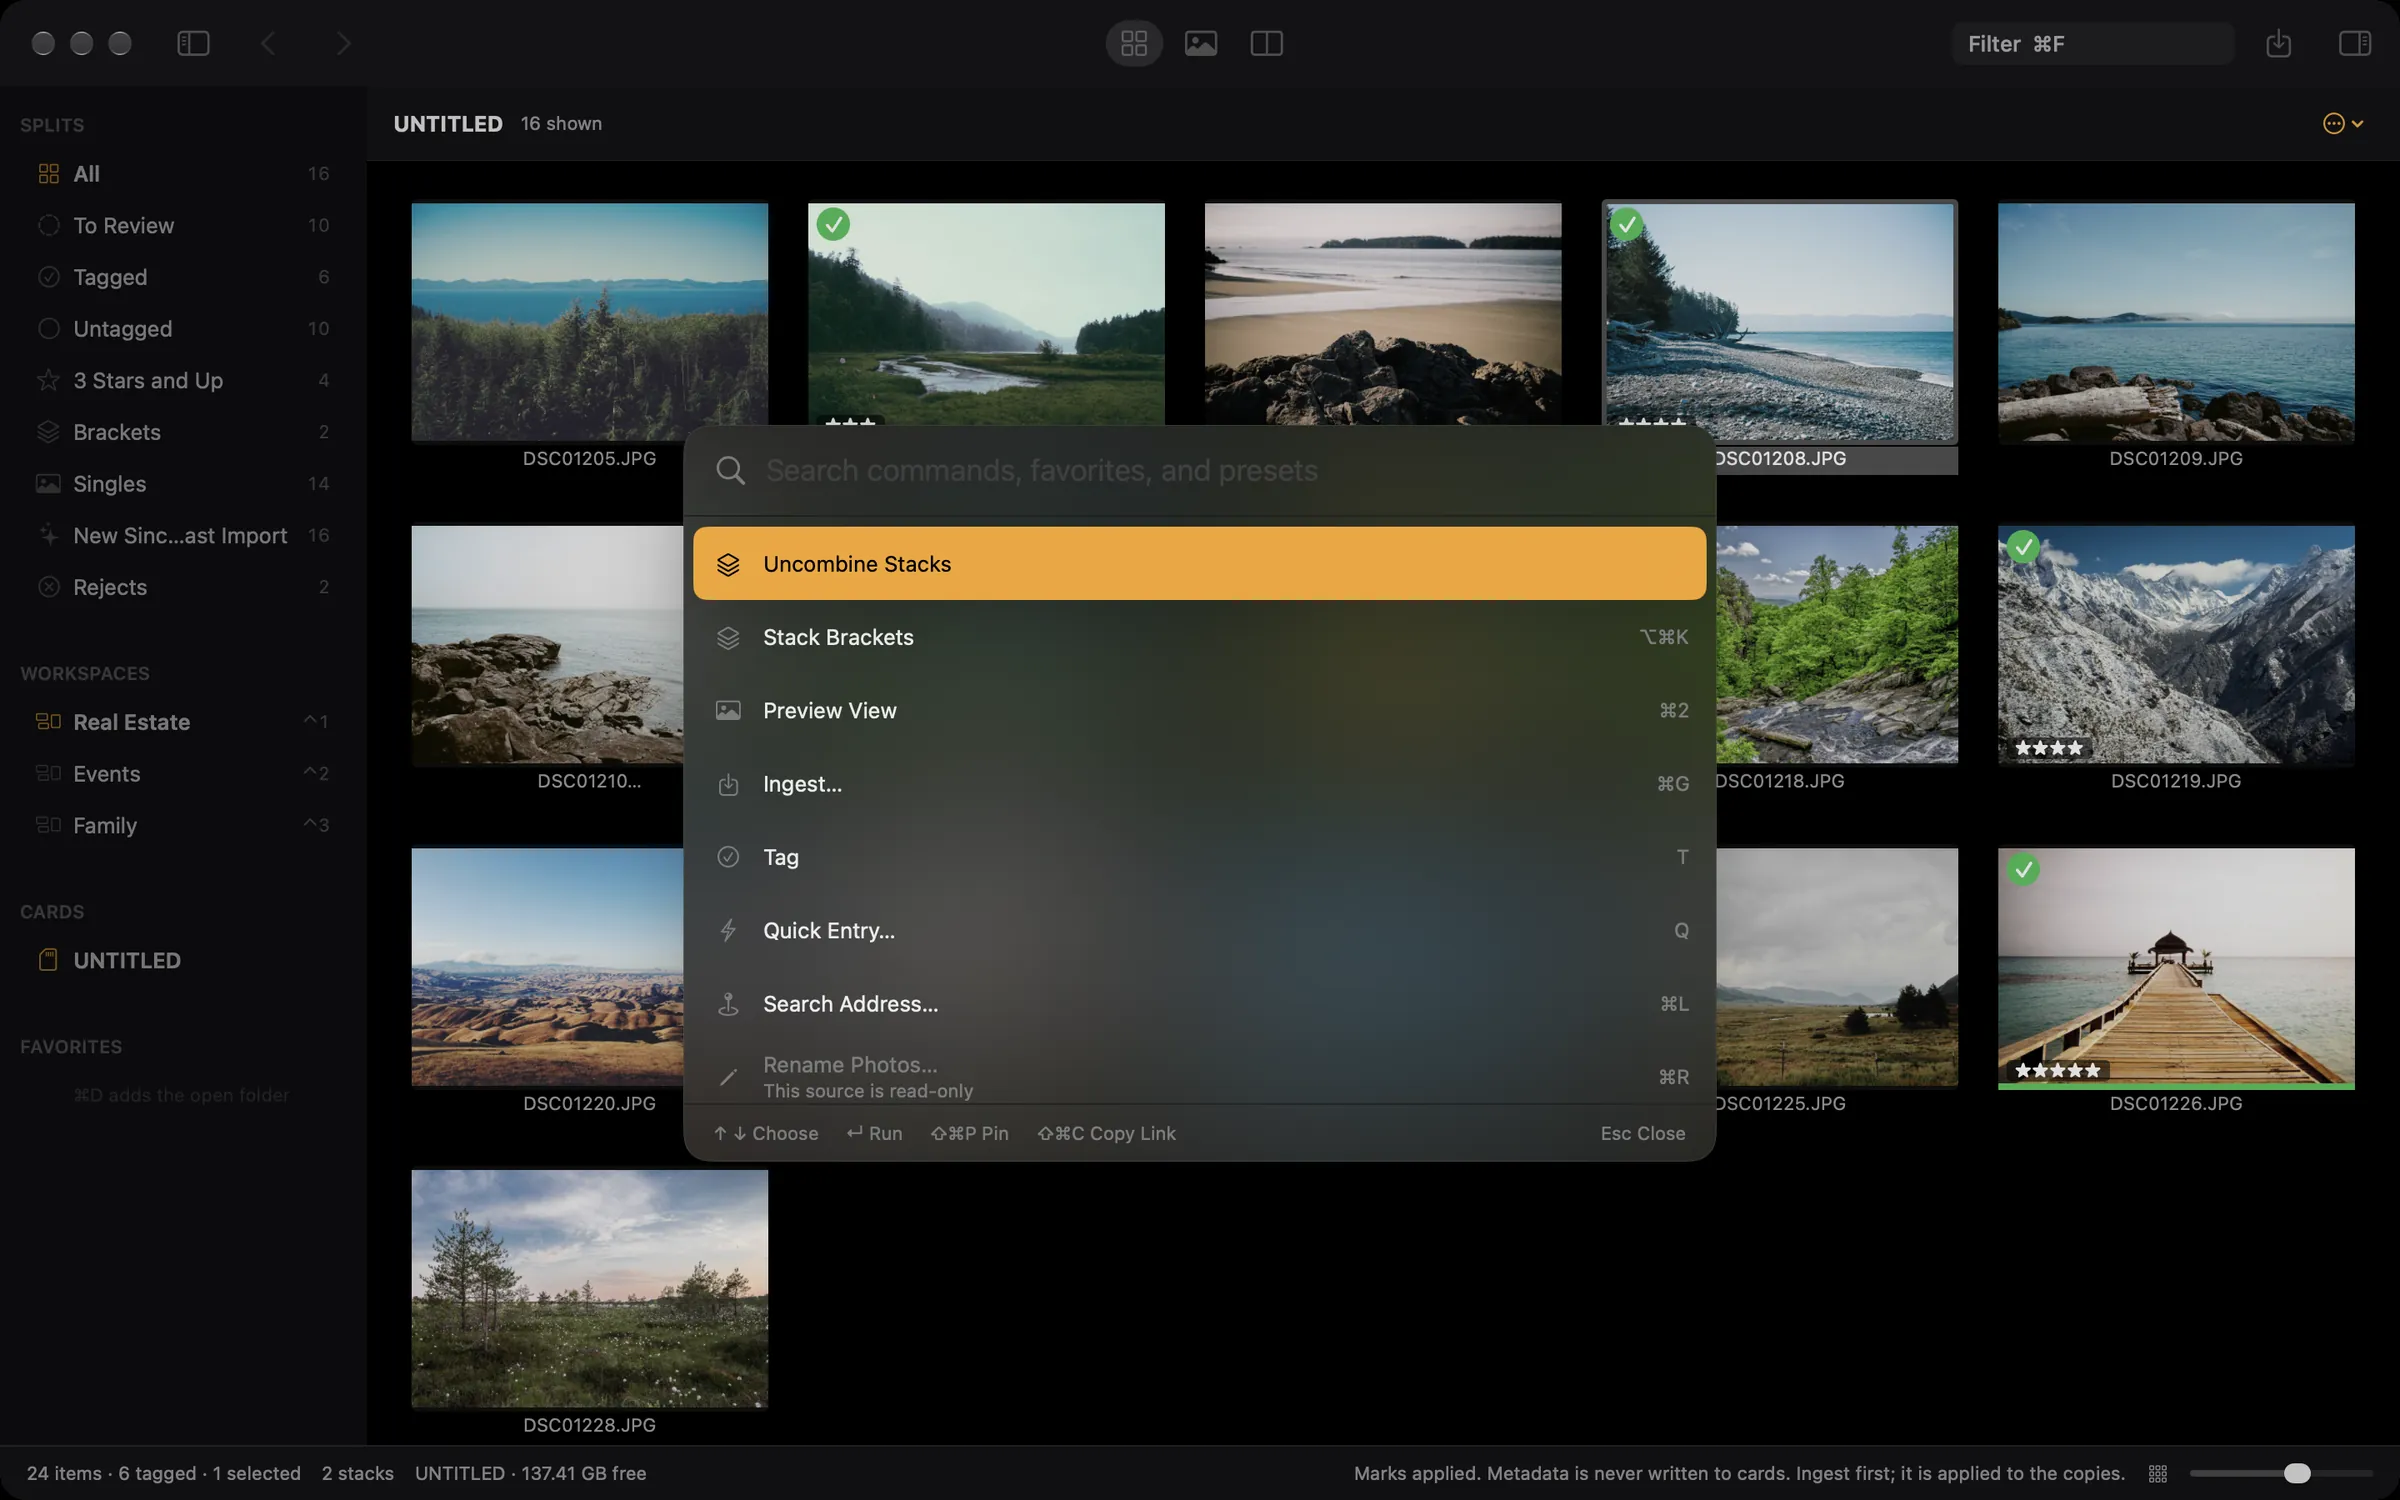
Every row shows its key, so the palette teaches the keyboard while you use it. Commands that cannot run right now stay visible with the reason underneath, rather than vanishing and leaving you wondering. ⇧⌘P pins a command to the top for good.
Your favourites, workspaces, splits, presets, actions, and recent folders are all in there too, so the palette is a way to go somewhere as well as a way to do something. ? shows the shortcut sheet, and holding ⌘ for a moment shows the keys that work where you are standing.
Settings
⌘, opens a window with eleven pages and a search field. Everything the app stores is in there with a real control: folder and app choosers instead of typed paths, pickers instead of remembered strings, live previews for templates, snippets, and splits, and drag to reorder wherever the order decides a number key.
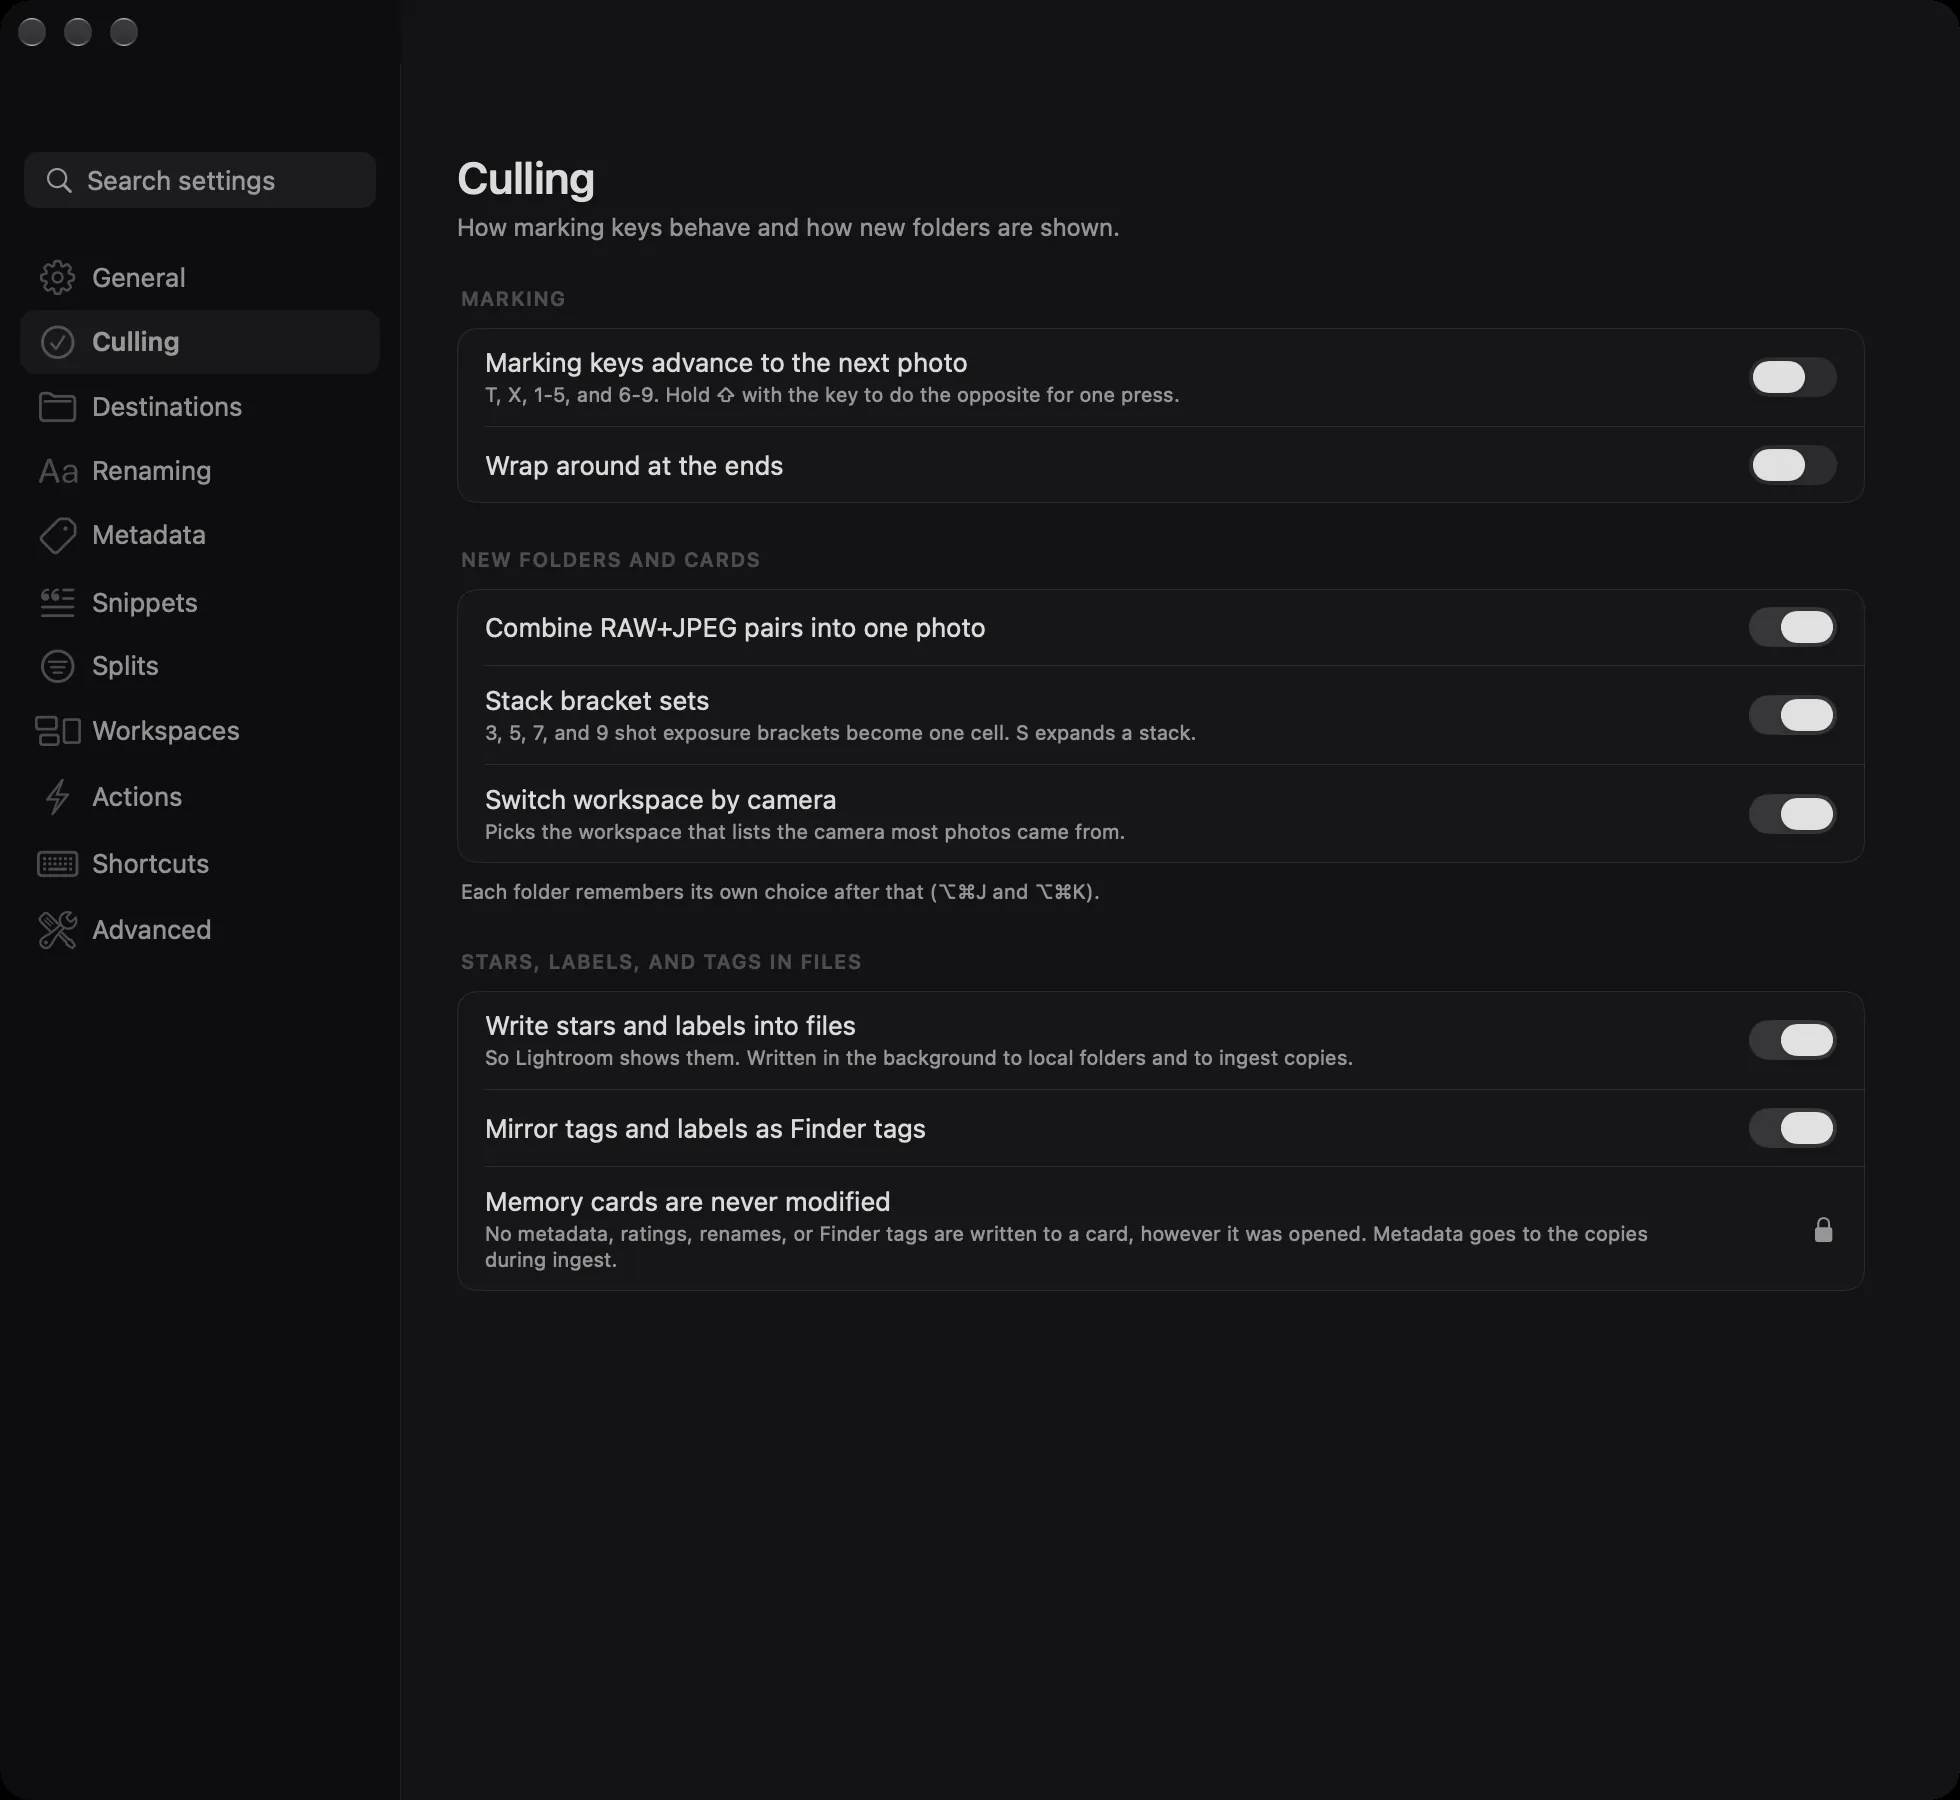
Edits apply as you make them, the way a Mac app should, and anything destructive is undoable with ⌘Z while the window is open. Settings, Advanced exports the whole configuration as one file to carry to another Mac, described on the automation page.
There is one row that is not a setting. On the Culling page, Memory cards are never modified has a lock beside it instead of a switch. It is listed so that the rule is visible, not so that it can be turned off.