 Ingest
Ingest / Quick start
Your first card, in five minutes.
Nine steps, each with the key you press. Every one links to the part of the guide that explains it, so read those later if at all.
-
Before you start
Ingest needs macOS 15 or later on an Apple silicon Mac. Have a card in the reader, or a folder of photographs. Sony ARW, Fujifilm RAF, JPEG, HEIC, and video all work, and the support page says what happens to everything else.
No account, nothing to install alongside it. If you would rather practise on something that cannot matter, choose Help, then Open Practice Folder.
-
Open the card
Put the card in. It appears in the sources list on the left, and Ingest opens it. For a folder instead, press ⌘O.
Photographs appear immediately, before the app has finished reading the card, because it reads the preview each camera already wrote inside each file. Why it is fast.
-
Look at them
Arrow keys move. Space opens the big view and Space closes it. Z goes to 100 per cent under your pointer, and Z again comes back.
Press I in the preview for the exposure. C puts two frames side by side with the zoom locked together. The preview.
-
Decide
One key each. T keeps it. X rejects it. 1 to 5 are stars, 6 to 9 are the Lightroom colours. ⌘Z undoes any of it.
The counts in the sources list move as you go, so you can see how much is left. If you would rather each key moved you on to the next photograph, that switch is in Settings, Culling. Culling.
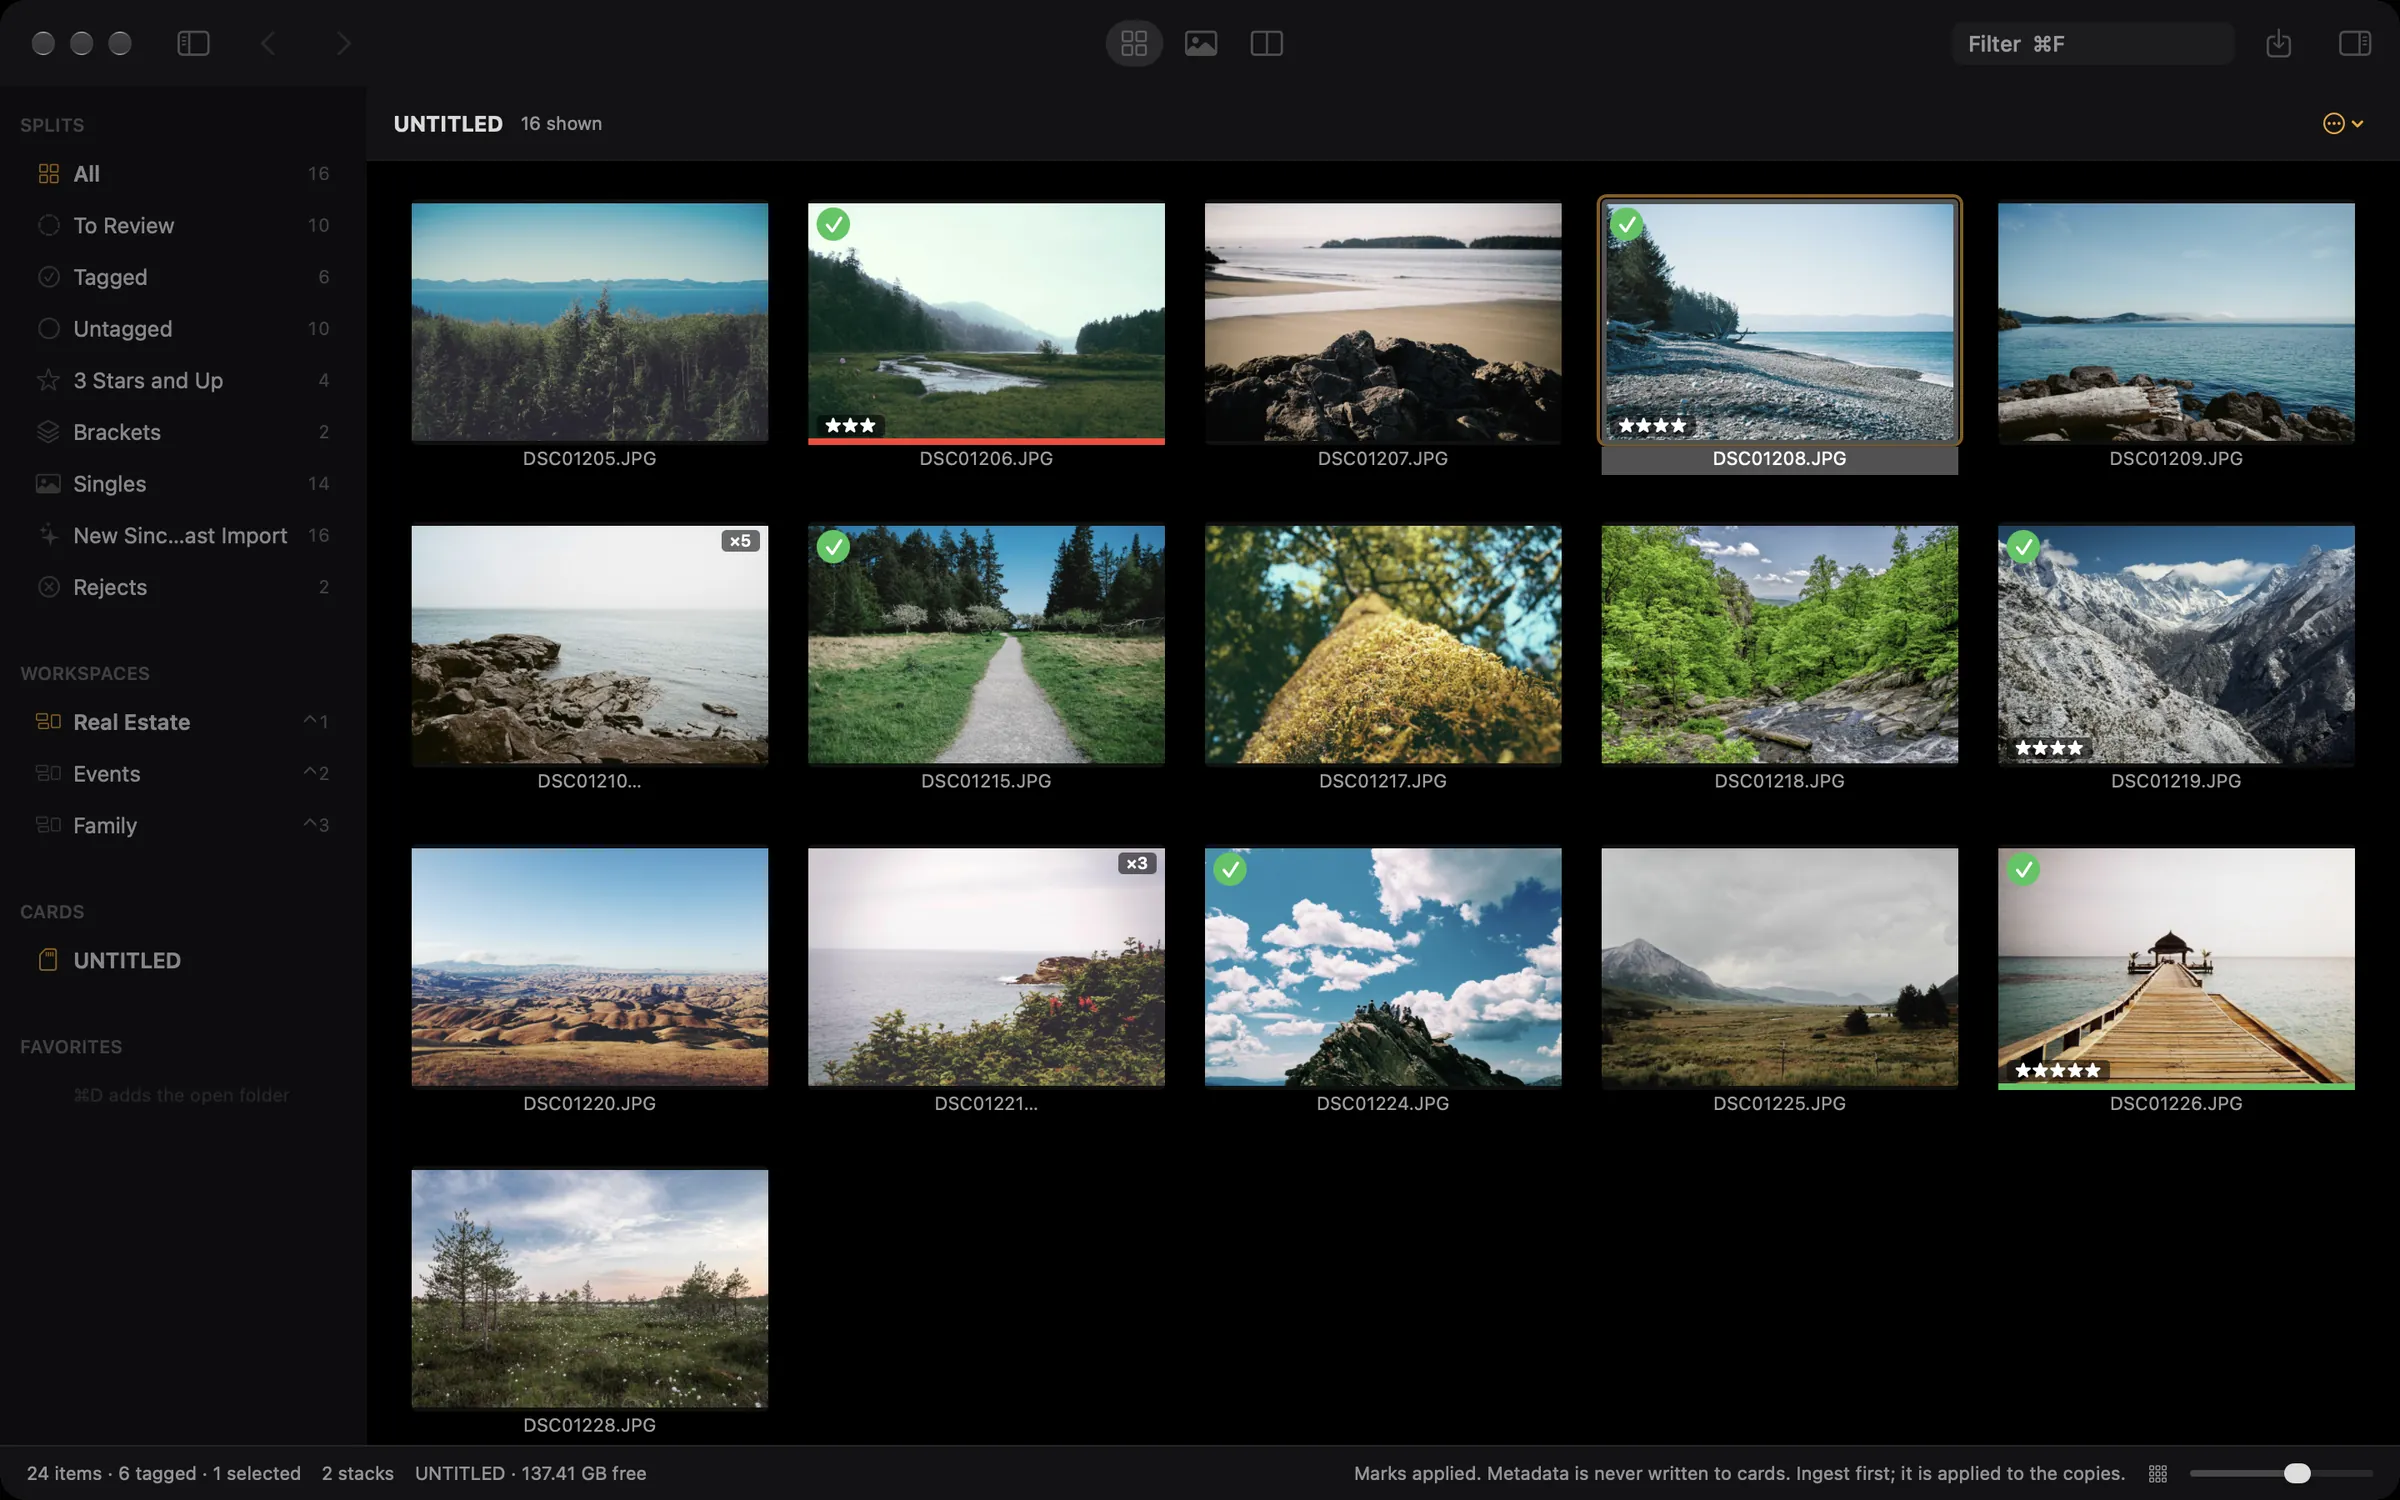
Part way through. Rejected frames are hidden, and the toolbar says so. -
Deal with the brackets
If you shoot exposure brackets, each set is already one cell with a badge. S opens the set you are on, ⌥S opens all of them, and tagging a closed set tags every frame in it. Stacks.
-
Describe them, if you want to
Optional, and skippable entirely. Press Q and type one line:
coast sunrise 3* "First light at the pier". Keywords, a rating, and a caption in one go. ⌘L looks up an address and attaches the location.Nothing is written to the card. Ingest remembers it and writes it into the copies. Metadata.
-
Say where they go
Press ⌘G. The cursor starts in the destination field: type part of a folder's name, or press ⌘1 to ⌘9 for a favourite. ⌘D at any time adds the folder you are looking at to the favourites.
Turn on Rename and put
{yyyy}{mm}{dd}-{seqn}in the field if you want dated files with a number that never repeats. The preview underneath shows the actual names. Naming. -
Ingest
The tabs at the top choose what to copy, with counts, and ⌃1 to ⌃4 switch between them. Then press Return.
Each file is copied, read back, compared to the original, and only then given its real name. Nothing is ever overwritten. Files are removed from the card only if you asked, and only the ones that verified. What happens during an ingest.
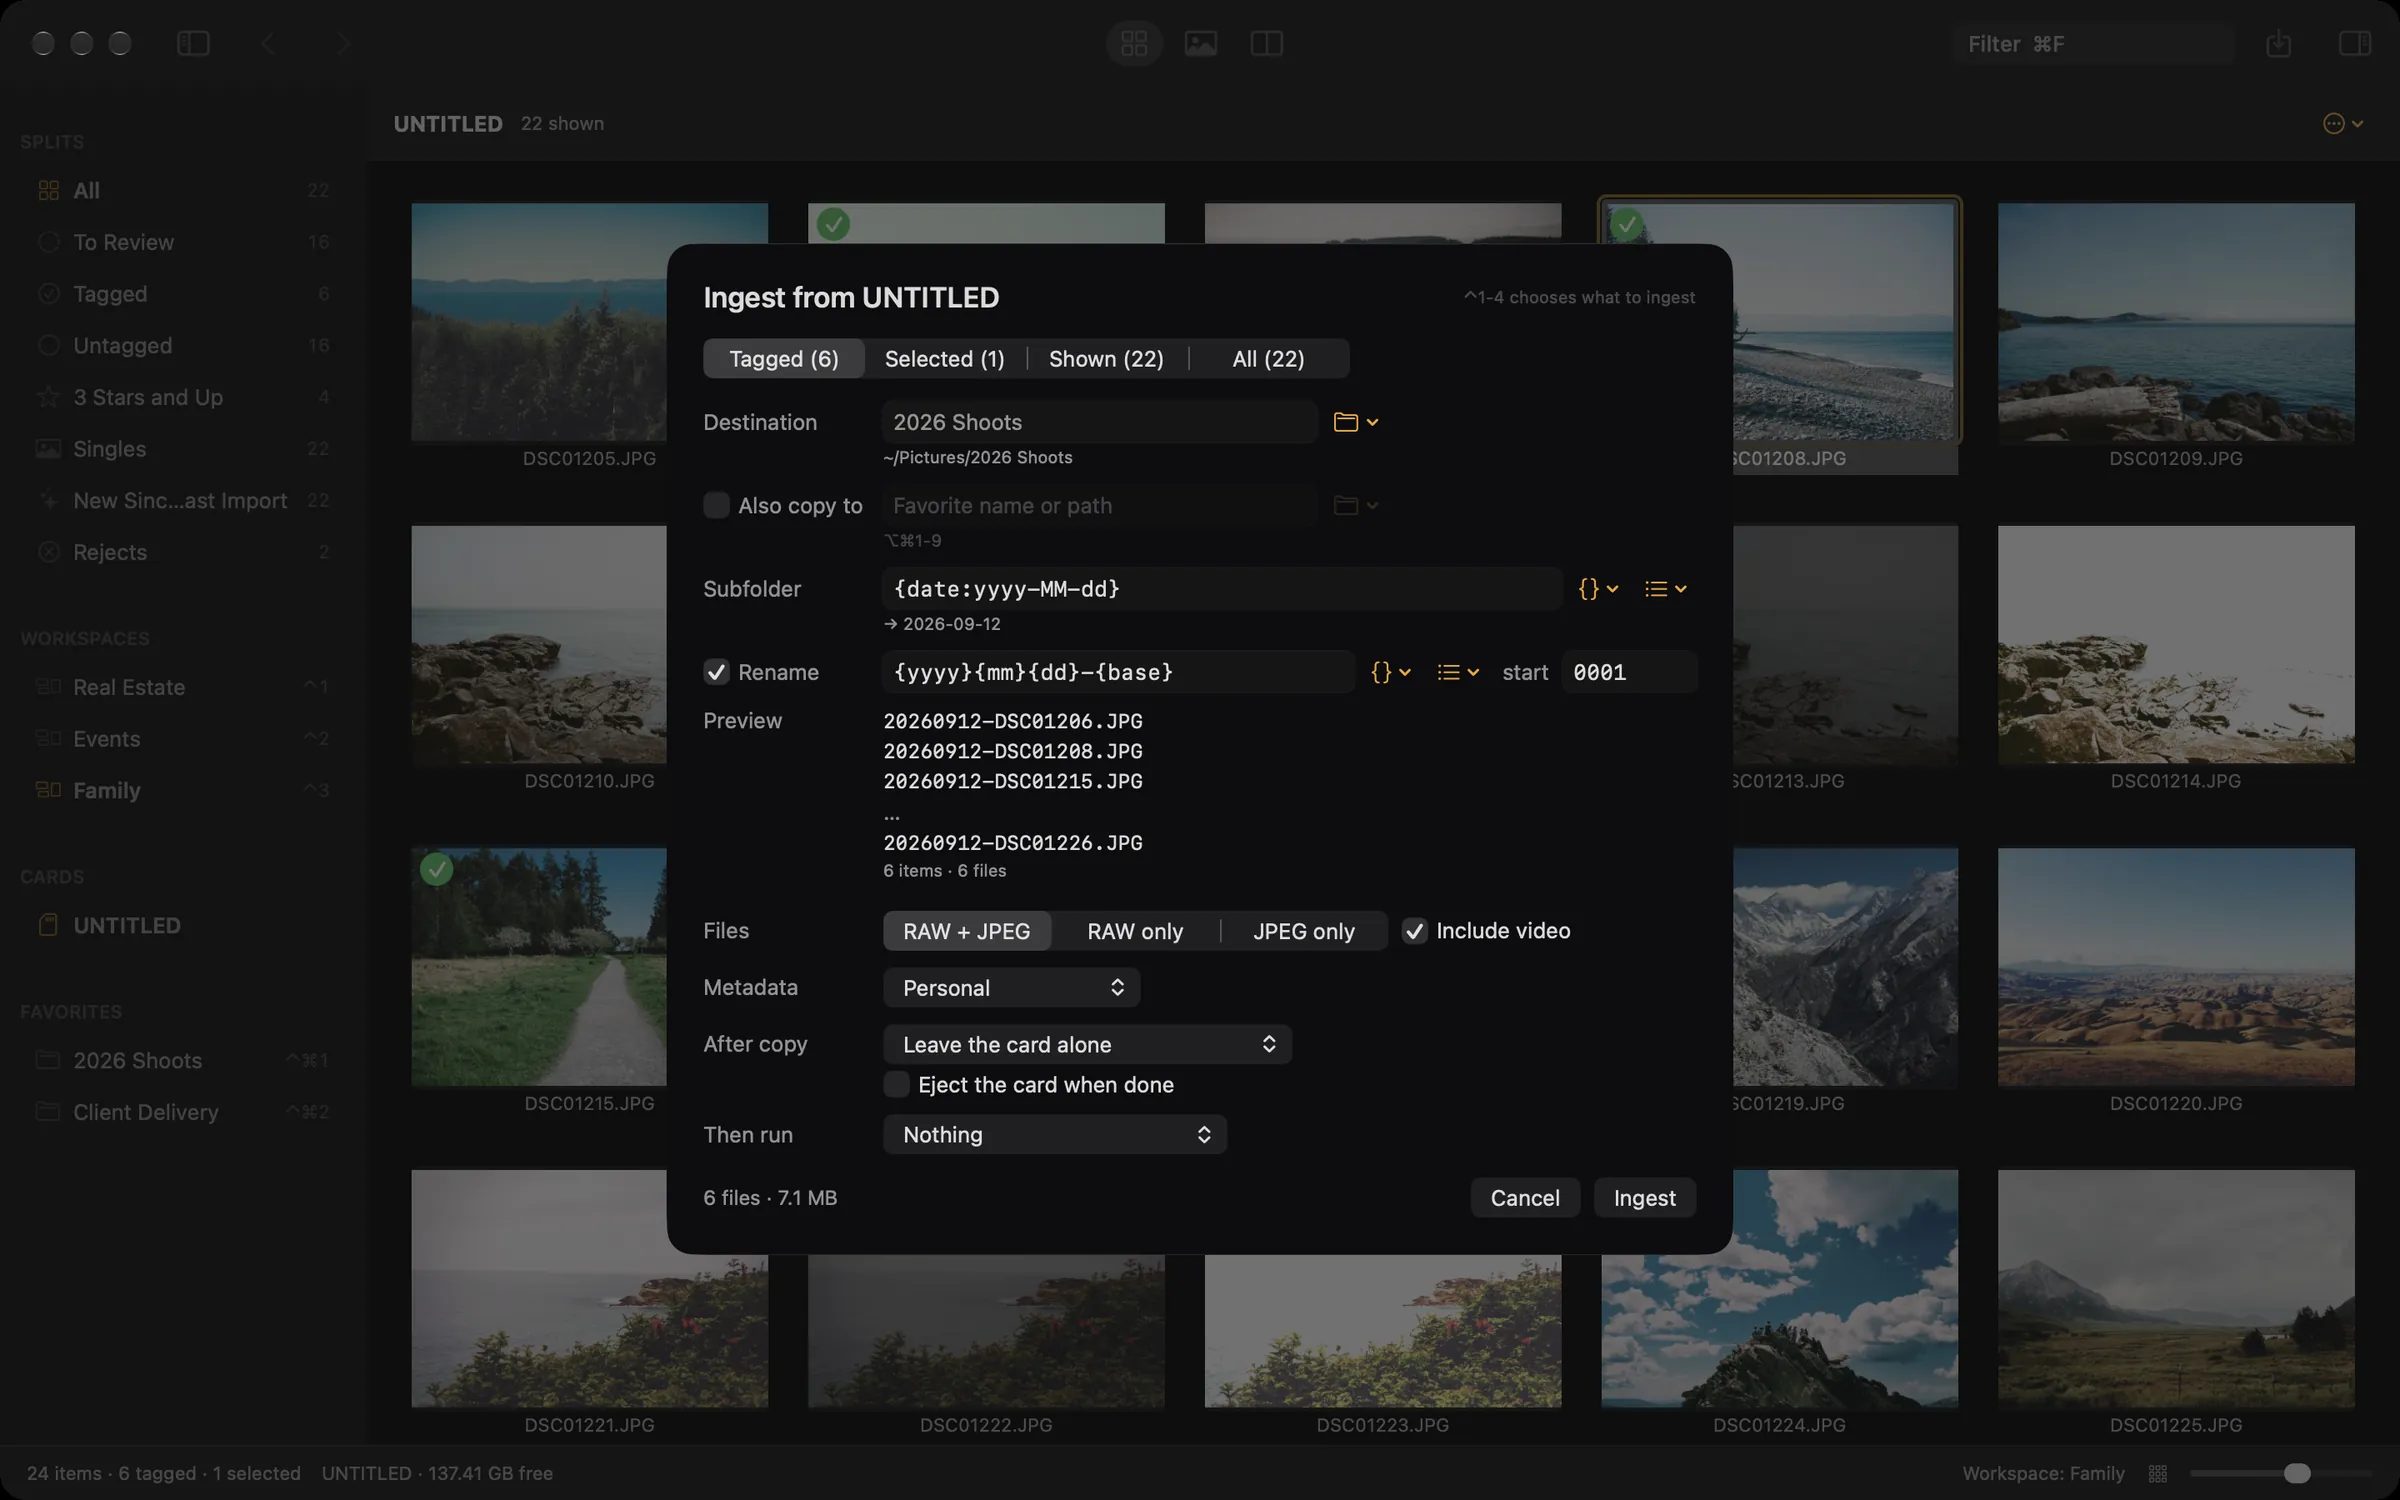
Everything it is about to do, before it does any of it. -
Afterwards
Ingest switches to the destination so you can see what arrived. ⌘E ejects the card. ⌘[ goes back to it if you are not finished.
That is the whole loop. The next card is ⌘G and Return, because the sheet remembers.
Where to go next
Every key, if you would rather learn the keyboard in one sitting. The guide, for how any of this actually works. Naming and quick entry, for the two syntaxes worth knowing.
And one thing worth setting up on day two: a workspace per kind of shoot, so the app arrives with the right defaults depending on which camera the card came from.